With VIP Mail Notifications on iPhone, Get Alerts From Your Favorite Persons Only
With VIP mail notifications, you only receive alerts from those most important to you across iPhone, iPad, and Mac. Here’s how to do it.
How many emails do you receive every week? How many of these are worth receiving a notification? Probably not many. This is where VIP Mail notifications come in on iPhone, iPad, and Mac. With the tool, you can elevate senders to VIP status and receive notifications each time they send you an email. Emails from VIPs are also kept in a special folder across all Apple devices.
Setup
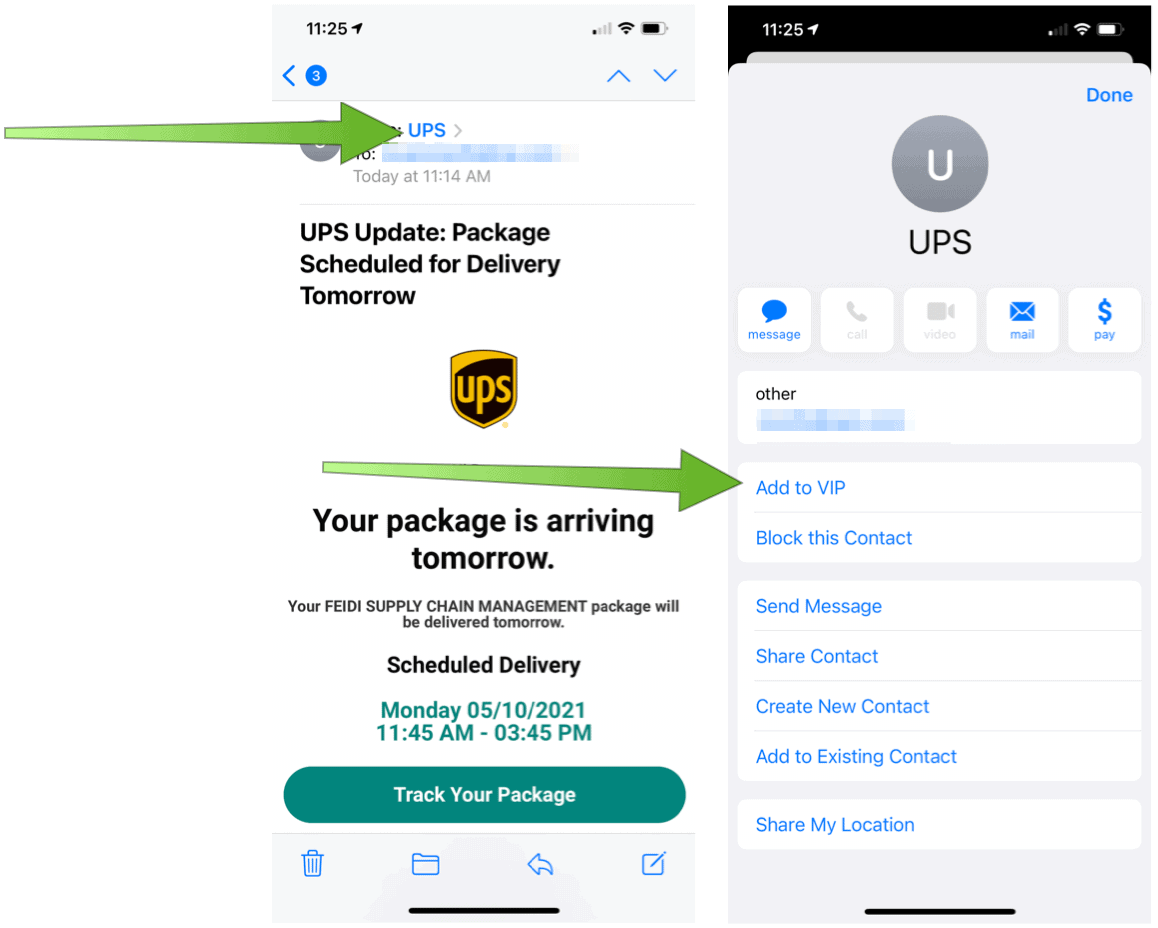
To add a sender to the VIP Mail list on iPhone and iPad, click on an email from the person or organization. From there:
- Choose the sender’s name or email address in the message header.
- Select Send to VIP.
- Tap Done.
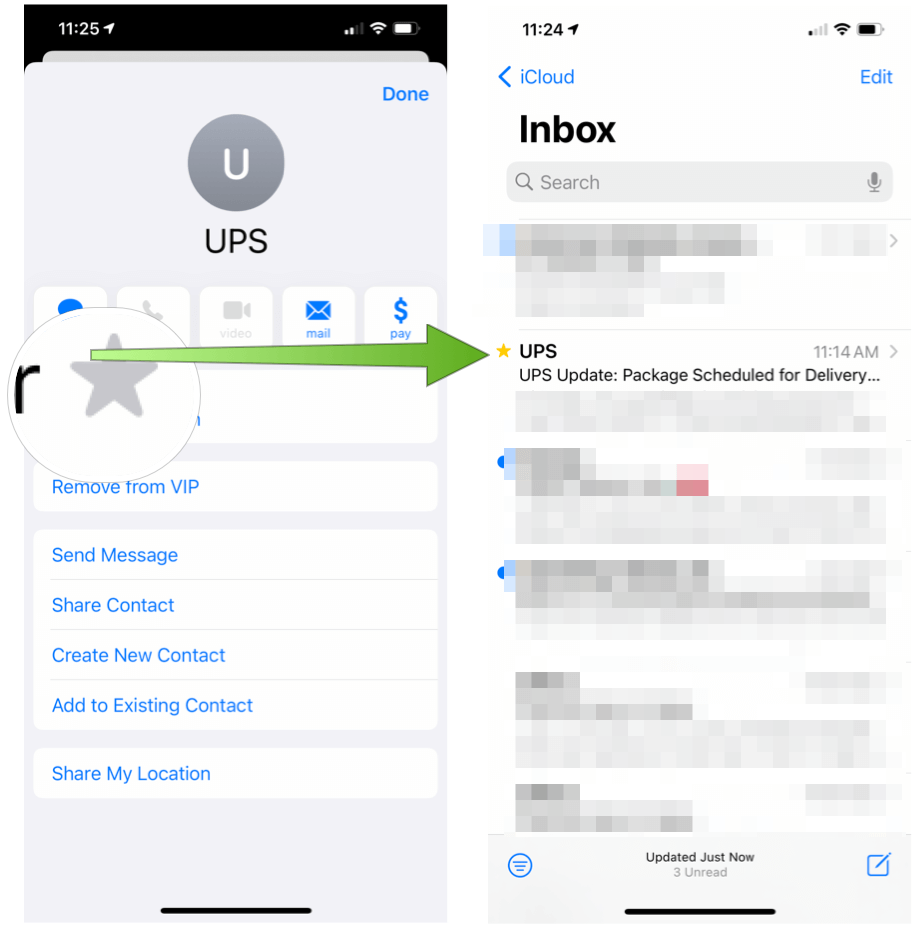
VIP status also shows up on Mail for Mac and when using Mail on iCloud.com, if applicable. In the following example, emails from UPS now have VIP status. A gold star icon denotes each.
Folder
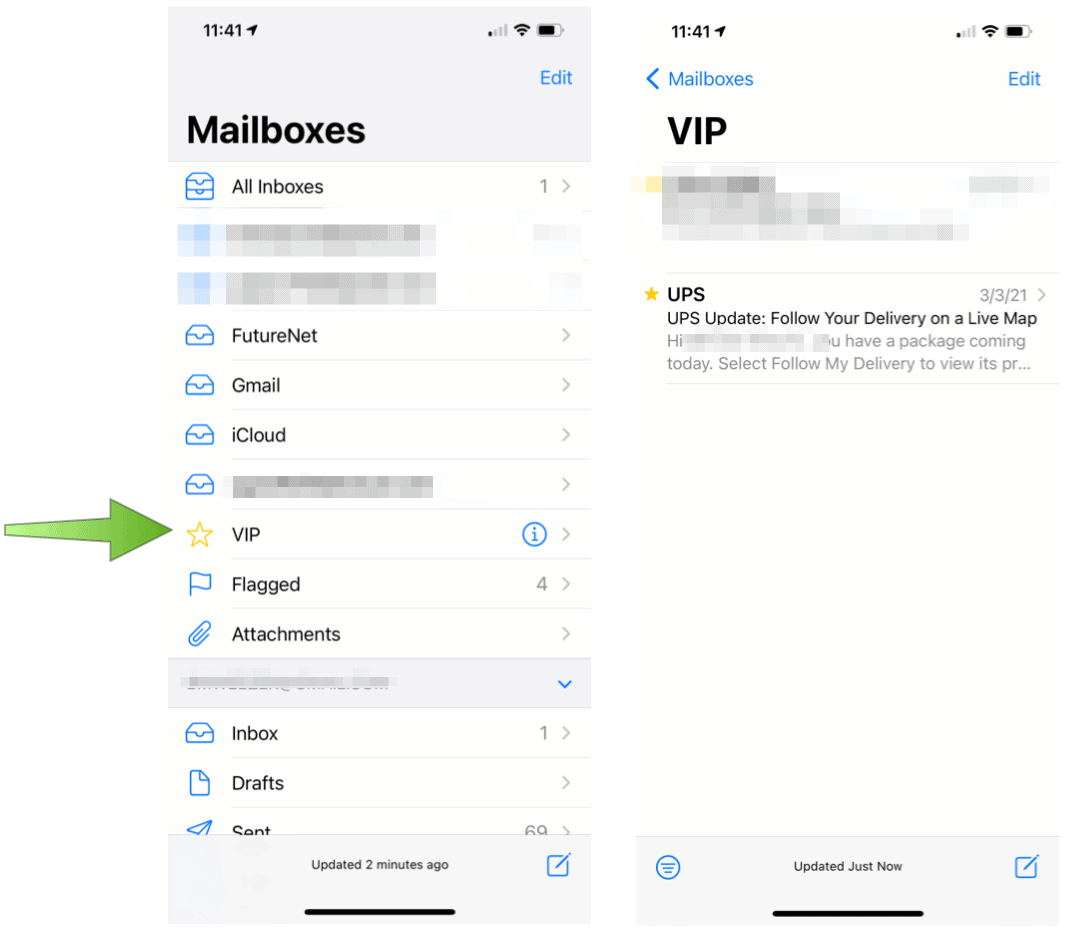
Once you assign VIP status, you can find all related emails in the VIP Mail folder. These include every email from the VIP, regardless of their location (for example, Inbox, All Mail, Trash). You can find the VIP Mail folder from the Mailboxes folder in the Mail app on your iPhone and iPad.
VIP Mail Notifications
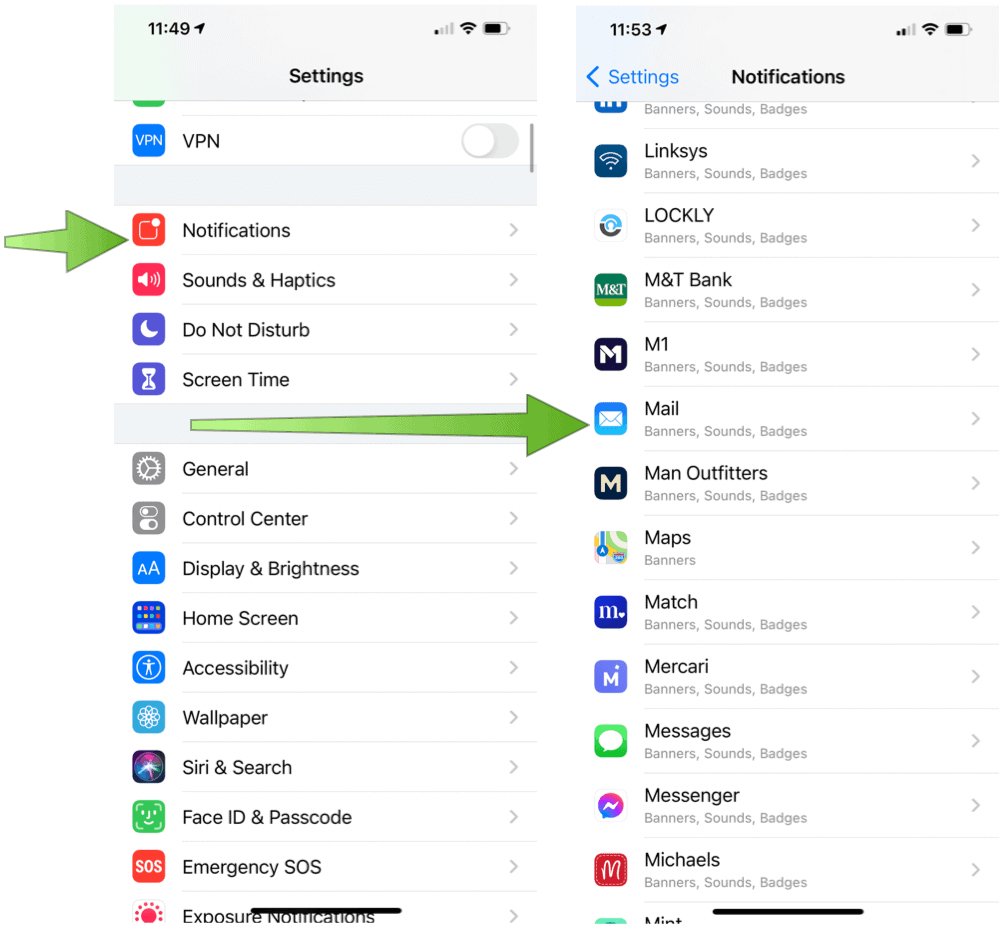
Once you set up VIPs, you can turn on notifications by going into the Settings app on iPhone or iPad. From there:
- Choose Notifications.
- Scroll down, select Mail under Notification Style.
Next:
- Tap VIP.
- Assign your notification styles. In iOS 14, these include alerts for Lock Screen, Notification Center, and Banners.

VIP Notifications on Mac
On the native Mail app on macOS, you can also see emails from VIPs and assign the status to new senders. To get started:
- Go into the Mail app.
- Choose an email from one of your would-be VIPs.
- Click on the user’s name or email in the message header.
- Select Add to VIP from the pull-down menu.

On Mac, you’ll find the VIP folder next to the other ones in the Mail app. Interestingly, you can’t assign notifications for VIPs only in macOS Big Sur. Instead, all mail notifications are either off or on.
There are countless email apps available for iPhones and iPad. And yet, most continue to turn to the native app, which is simple to use and works with any services, including iCloud, Google, Outlook, and more. We received covered email signature creation on iPhone and explained sending files via Mail Drop on iPhone using iCloud.


