What to Do Before Upgrading to a New Mac

When you get a new Mac computer there are some important things you need to do with your old machine before upgrading to the new one.
Macs last a long time, but not forever. When the time comes to switch machines, you should perform a few essential tasks on the old computer to guarantee both a smooth transition and to protect your data.
To prepare for the move, you should do the following:
- Back up your old Mac
- Log out of all Apple services
- Deauthorize the machine
- Remove data, then reinstall macOS
Backing Up Your Old Mac
Every Mac comes with a backup program called Time Machine. When activated, the program creates incremental backups of files on your drive. When trouble occurs, you can restore specific files or your entire system with ease. Time Machine backs up the following:
- Local snapshots as space permits.
- Hourly backups for the past 24 hours.
- Daily backups for the past month.
- Weekly backups for all previous months.
If you’ve already been keeping backups regularly before moving to a new computer, you’ve already performed the most important step of the migration. Otherwise, you’ll need to create a new backup before moving forward.
Log Out of All Apple Services
It’s now time to log out of iCloud on your outgoing Mac. Luckily, Apple makes this simple. To get started:
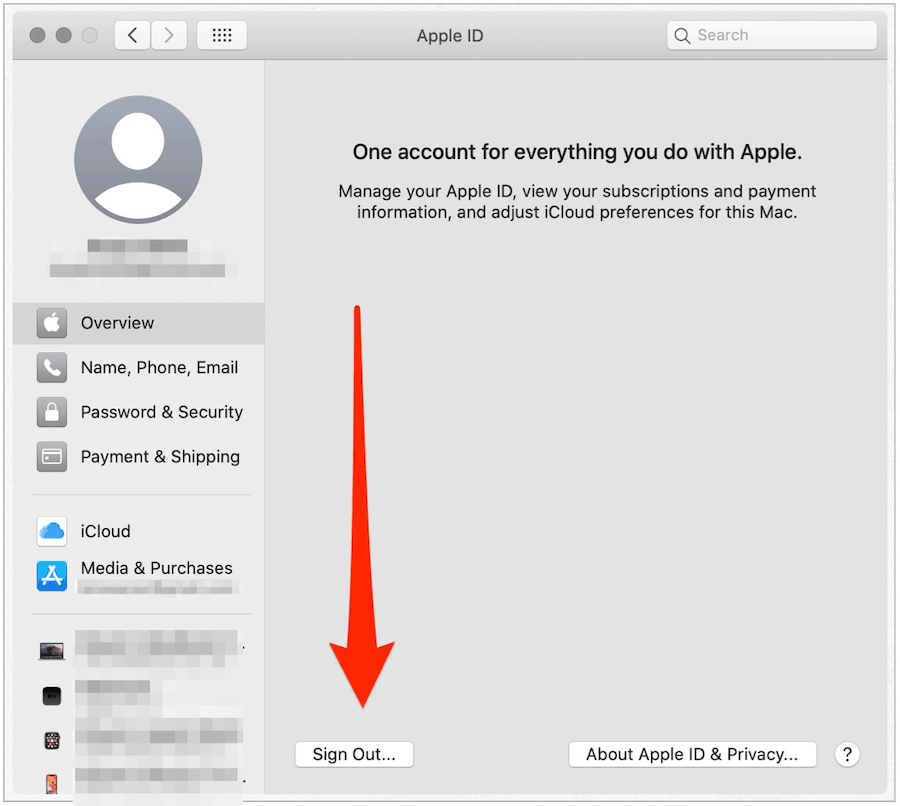
- Click on System Preferences on the Mac Dock. You can also find System Preferences by clicking on the Apple icon at the top left of your desktop.
- Choose Apple ID in System Preferences.
- After selecting the Overview selected on the left, select Sign Out.
You’ll receive prompts asking whether you want to leave copies of iCloud data on your Mac. Because you’re going to delete everything from your Mac later on in the process, this isn’t necessary.
Once signed out of iCloud, you should also go into the Messages and FaceTime apps and log out of iCloud, if applicable:
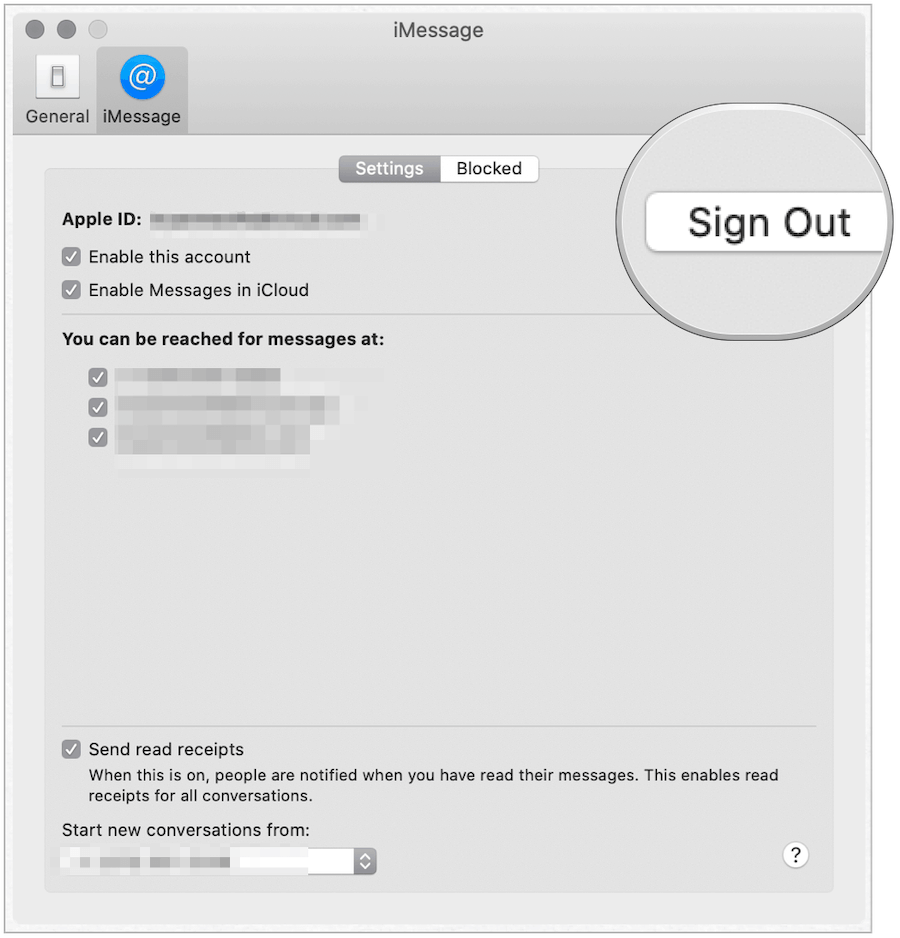
- In the Messages app, click Messages > Preferences from your Mac’s Toolbar.
- Click on the iMessage tab.
- Select Sign Out.
- Confirm that you wish to sign out.
In the FaceTime app on your Mac:
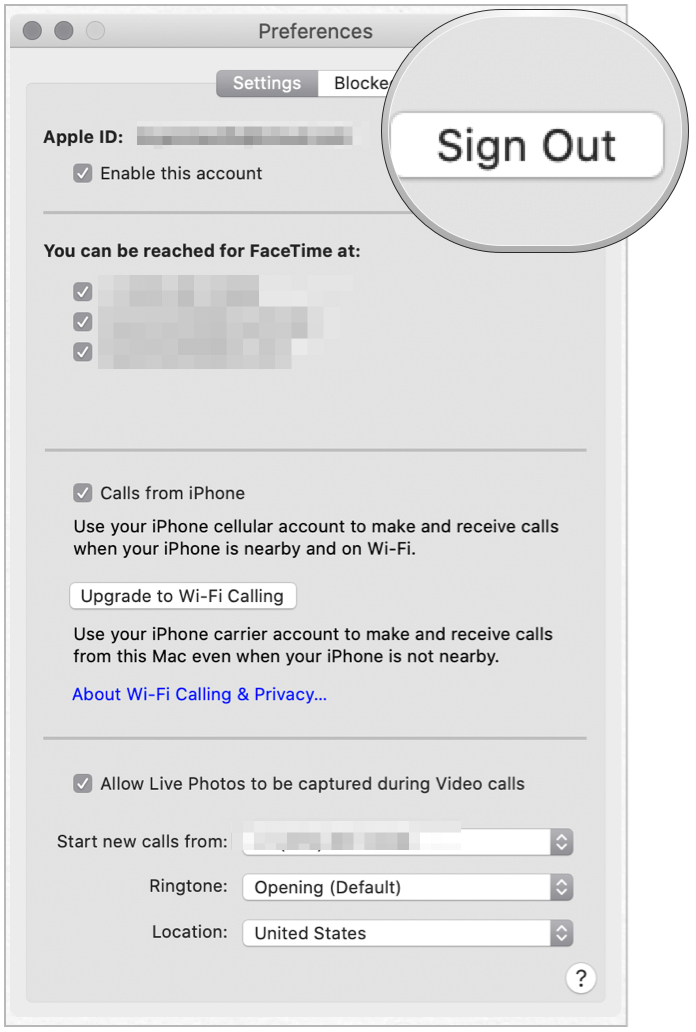
- Click FaceTime > Preferences from your Mac’s Toolbar.
- Click Sign Out.
- Confirm that you wish to sign out.
Deauthorize the Machine
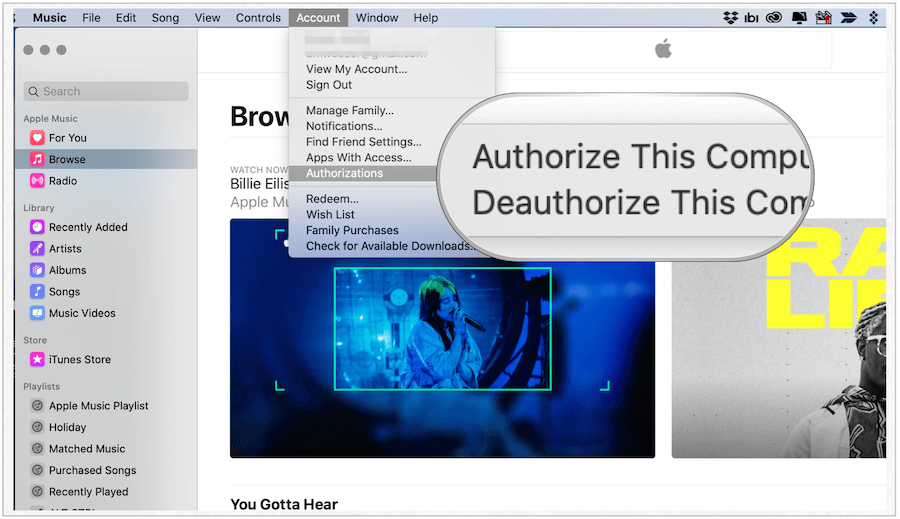
You should now deauthorize your Mac, assuming. you’ve used it in the past with music, video, or other media files. Before the release of macOS Catalina, you would have performed the following steps in the iTunes app. It’s now performed in the Music app.
- In the Music app, click Accounts on the Mac Toolbar.
- Select Authorizations.
- Choose Deauthorize This Computer.
- Confirm your choice.
Remove Data, Then Reinstall macOS
You’ve successfully backed up your old computer, signed out of iCloud and other services. You’ve also deauthorized the old computer. The final step in the process is to remove the data from the machine, then reinstall macOS. The final two steps remove access to your important files while also preparing the Mac for a new user.
Removing Your Data
- Click the Apple icon at the top left of your computer.
- Select Restart.
- Press and hold Command (⌘)-R until you see the Apple logo.
- Enter your system password, if applicable.
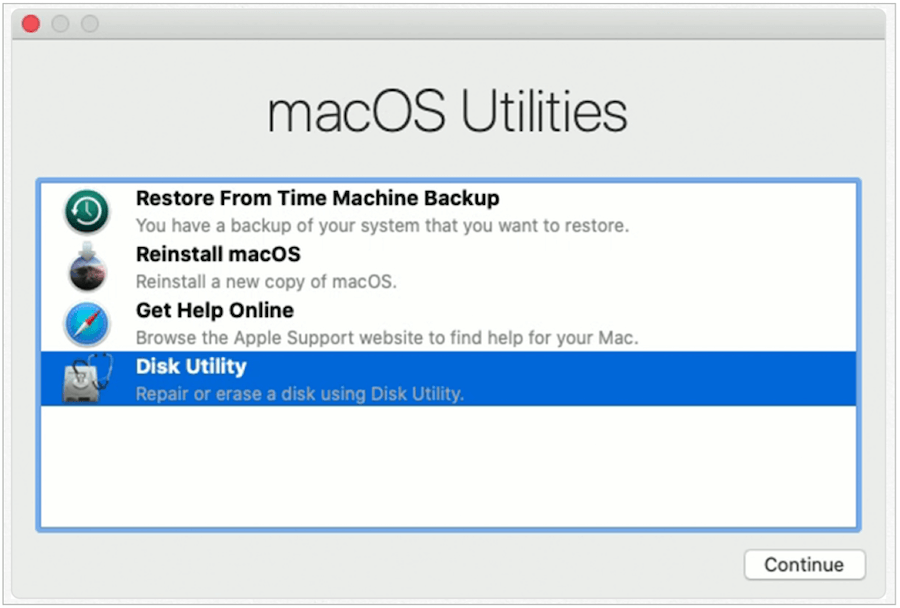
- Select Disk Utility from the utility window in macOS Recovery.
- Click Continue.
In the Disk Utility, look for the name of your startup disk on the left side of the screen. Most likely, it’s named Macintosh HD.
- Click on your startup disk, which should expand the folder.
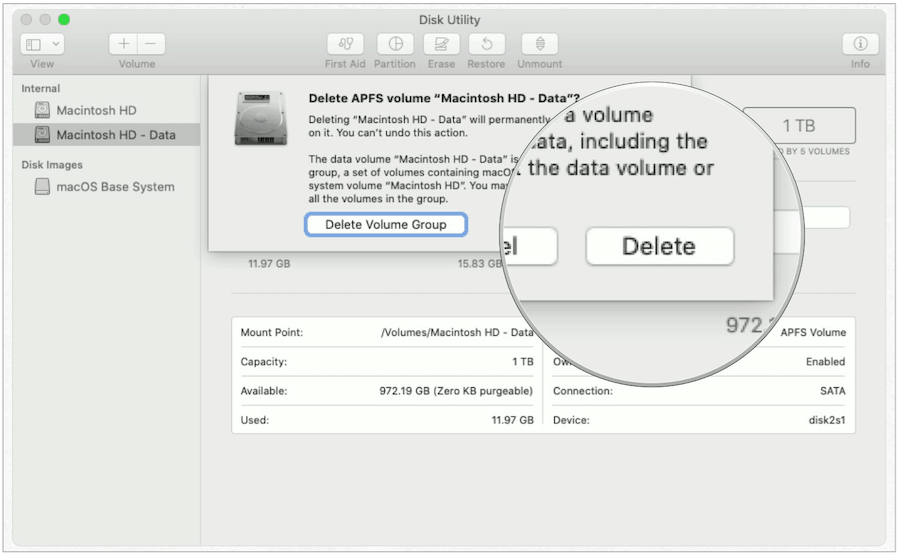
- Click Macintosh HD – Data, which is the volume that includes your data.
- Choose Edit > Delete APFS Volume from the menu bar, or click the “–” button in the Disk Utility toolbar.
- Click the Delete button. Do not click Delete Volume Group.
- If there are other volumes under the startup disk, delete those too. DON’T DELETE THE STARTUP DISK.
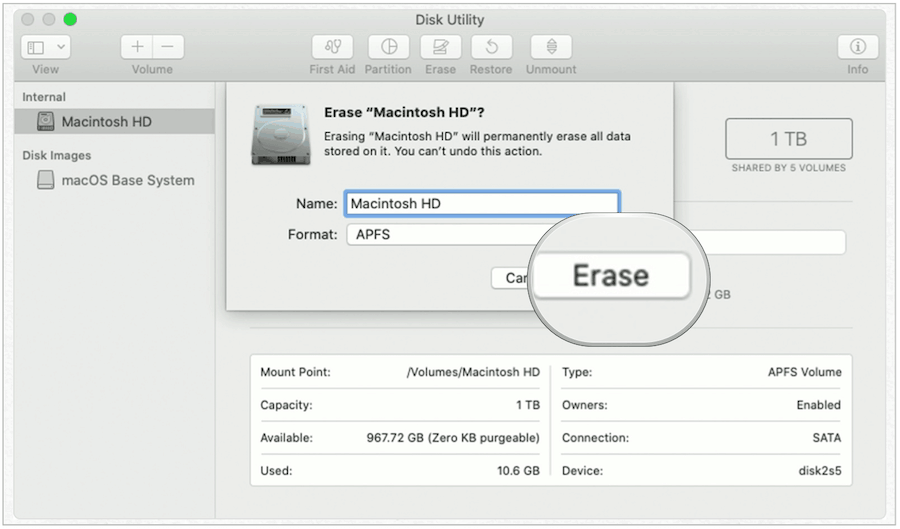
Next, select Macintosh HD in the sidebar, then:
- Click the Erase button.
- In the popup, enter the Name. (Keep the default, Macintosh HD.)
- In the popup, enter the Format. (Choose either APFS or Mac OS Extended (Journaled.) Disk Utility shows the recommended Mac format by default.
- Click Erase, enter your Apple ID, if necessary.
- When done, quit Disk Utility to return to the utility window.
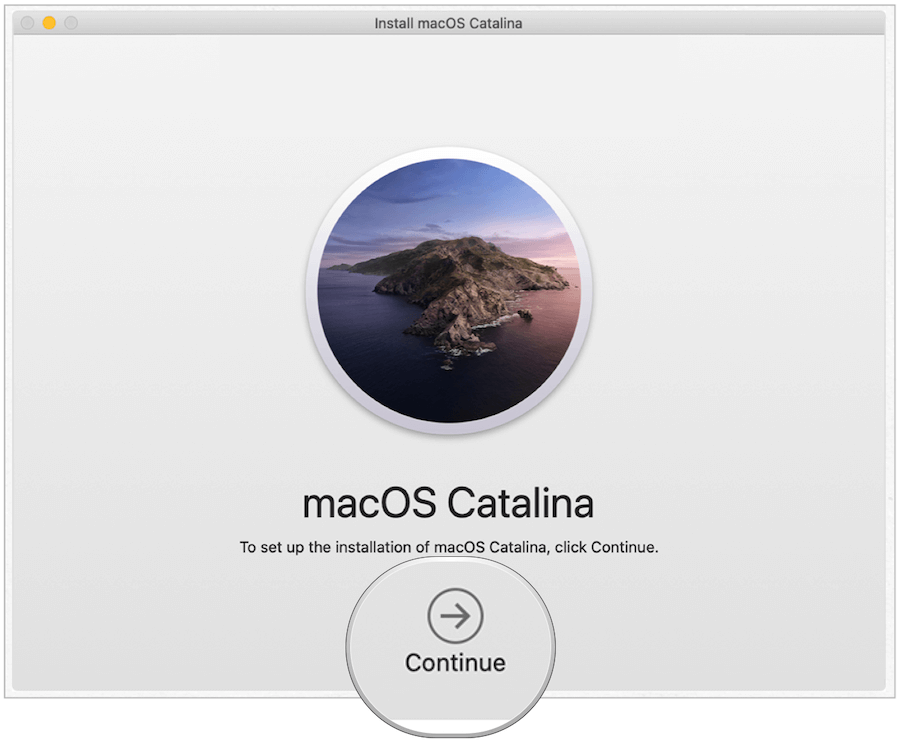
You’ve deleted your data. Finally, it’s time to reinstall macOS.
Reinstalling macOS
- On the Disk Utility menu, select Reinstall macOS.
- Click Continue.
- Follow the on-screen directions.
Once macOS is reinstalled, you can turn off your old Mac. It’s now ready for a new owner and you can begin enjoying your new computer!