How to Split Microsoft Excel Data into Multiple Columns

There are two ways to split Microsoft Excel data into multiple columns. Both ways, Text to Columns and Flash Fill are easy to do in just a few steps.
Grouped data in the same Microsoft Excel cell can be ungrouped using two unique functions. The “Text to Columns” and “Flash Fill” features let you split Microsoft Excel data with just a few steps. Here’s how to do it.
Split Microsoft Excel Data
The most obvious example of when you might want to split Microsoft Excel Data from one column to more is when names are involved. In the following two examples, the first and last names are in the same cells, but we want to change this to two.

Text to Columns
Using the Microsoft Excel Text to Columns tool, we want to take the first and last names listed in column A and split the information into two new columns, B and C.

To do this:
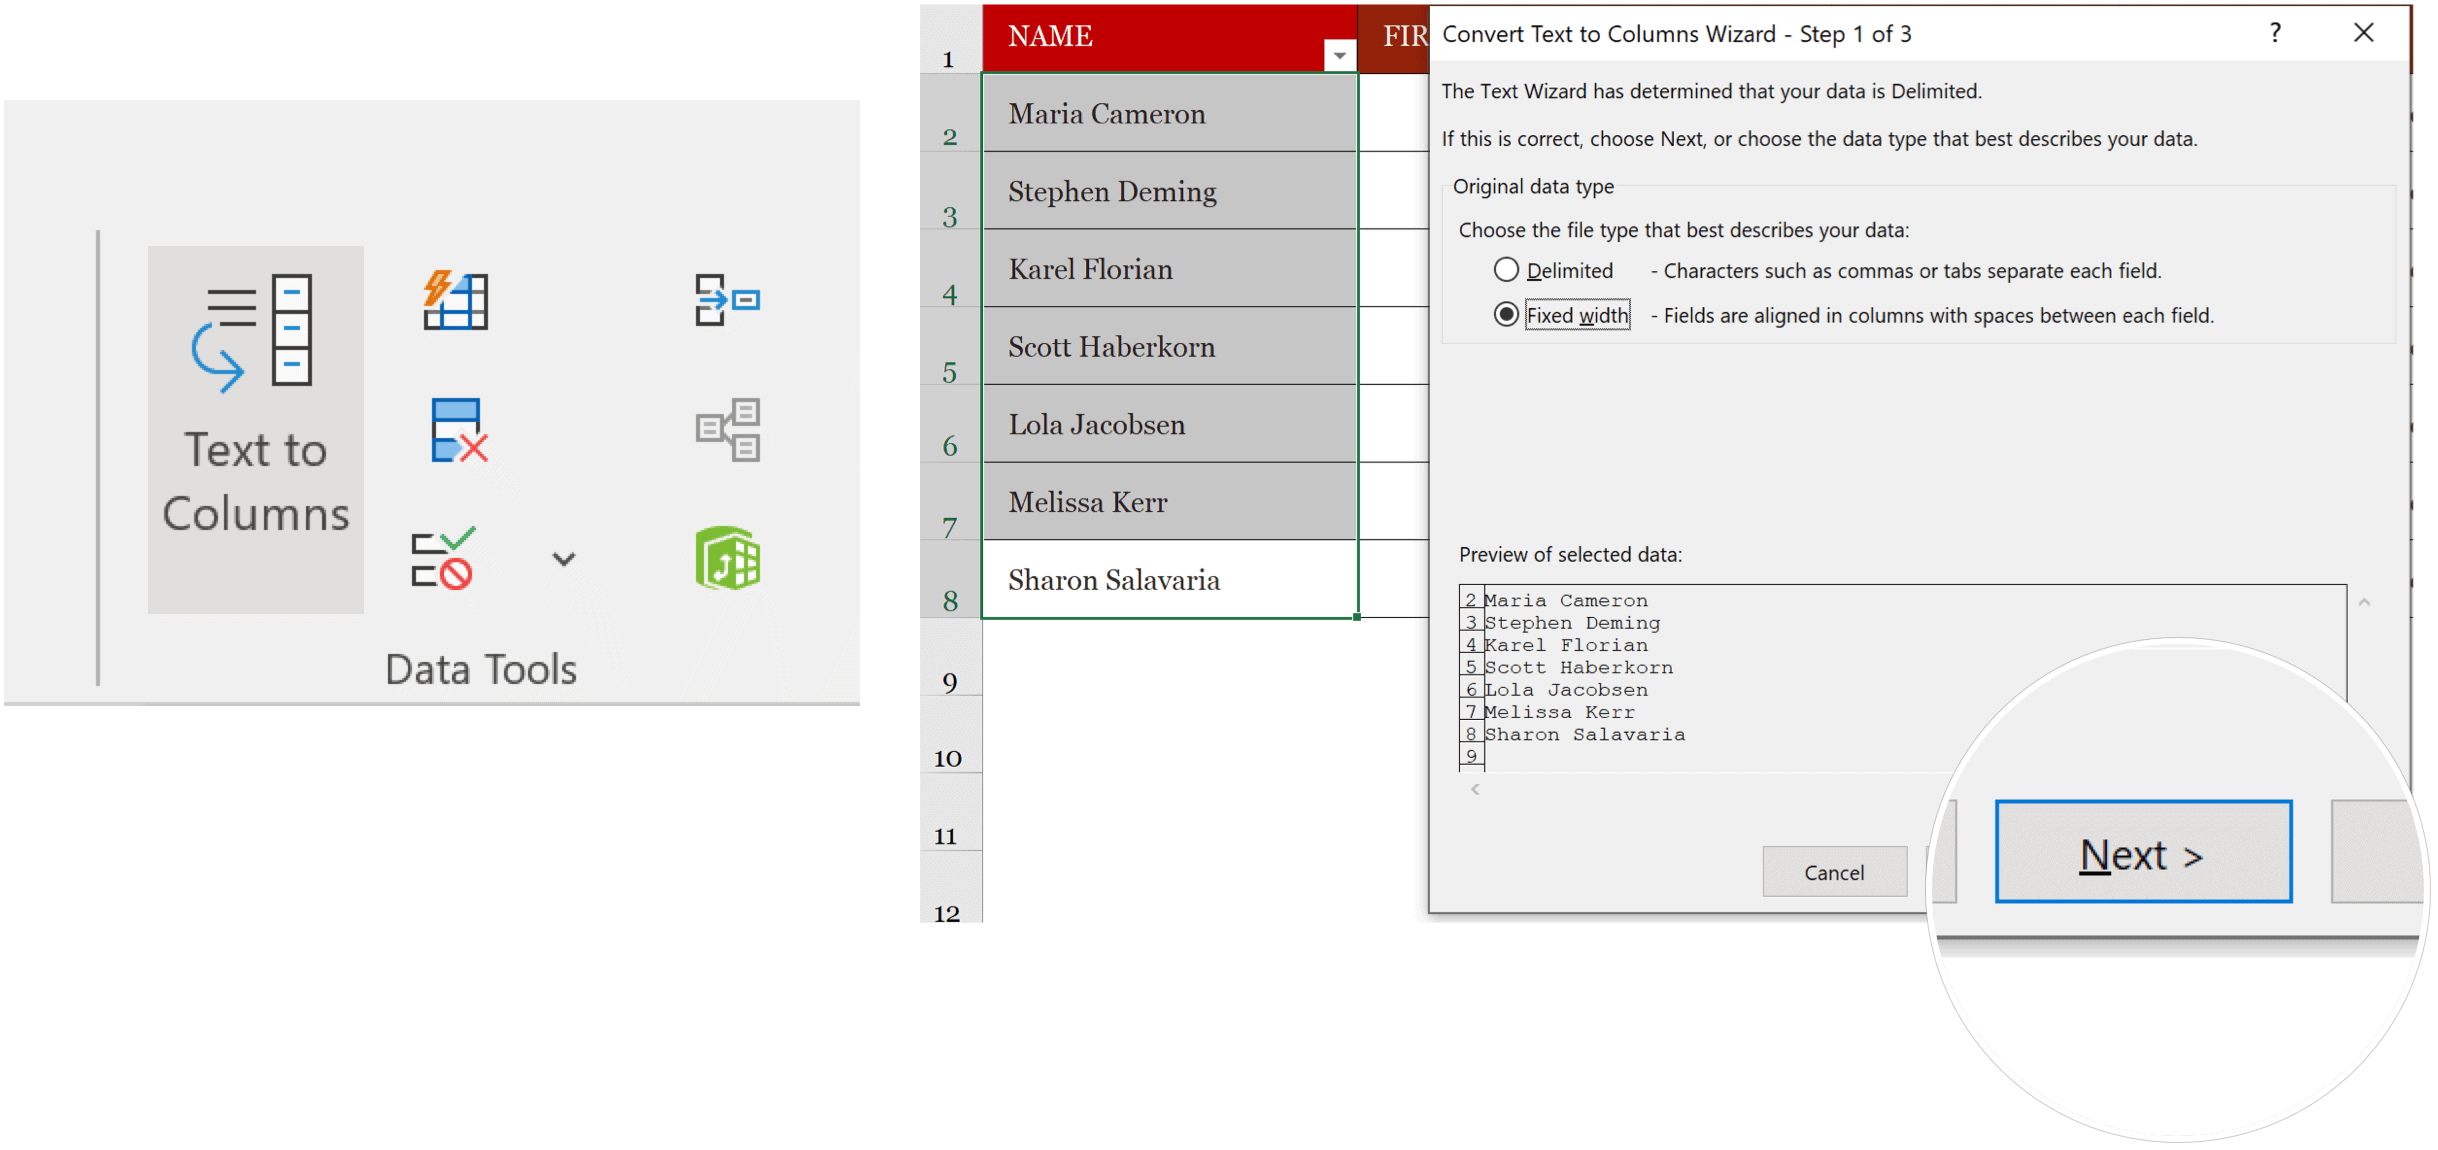
- Choose all of the cells in column A you wish to split.
- Select the Data tab on the Excel Ribbon.
- Click Text to Column.
- Choose Delimited in the Wizard.
- Click Next.
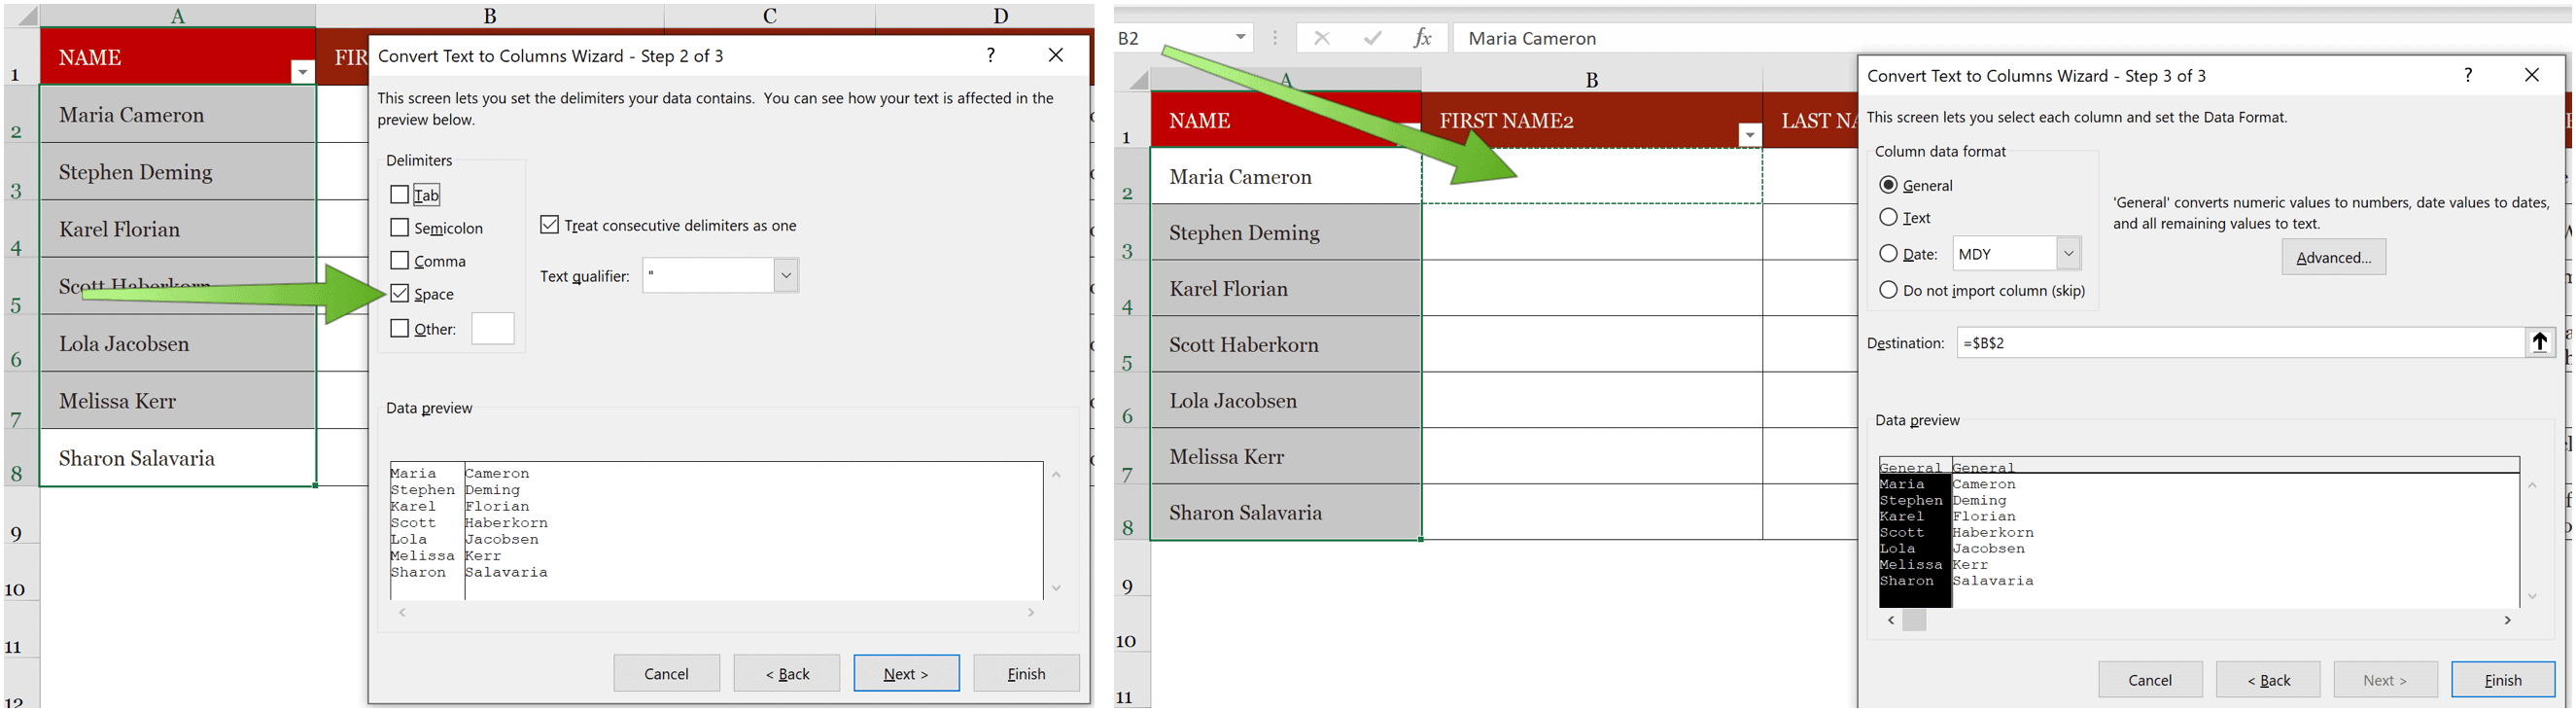
From here in the Wizard:
- Choose the Space box under Delimiter. Notice in the example, the first and last names are no longer shown in the same boxes.
- Select Next.
- Choose Destination, then add the location for the split content. In our example, we’d select the B2 cell.
- Click Finished.
Content from all the cells selected above is now in separate cells in columns A and B.

Flash Fill
For a smarter way to split Microsoft Excel data, consider using Flash Fill. The tool is ideally suited for when you’re dealing with fewer cells. In the following example, we type in the first name of the first contact in the appropriate cell. In this case, B3.
Next:
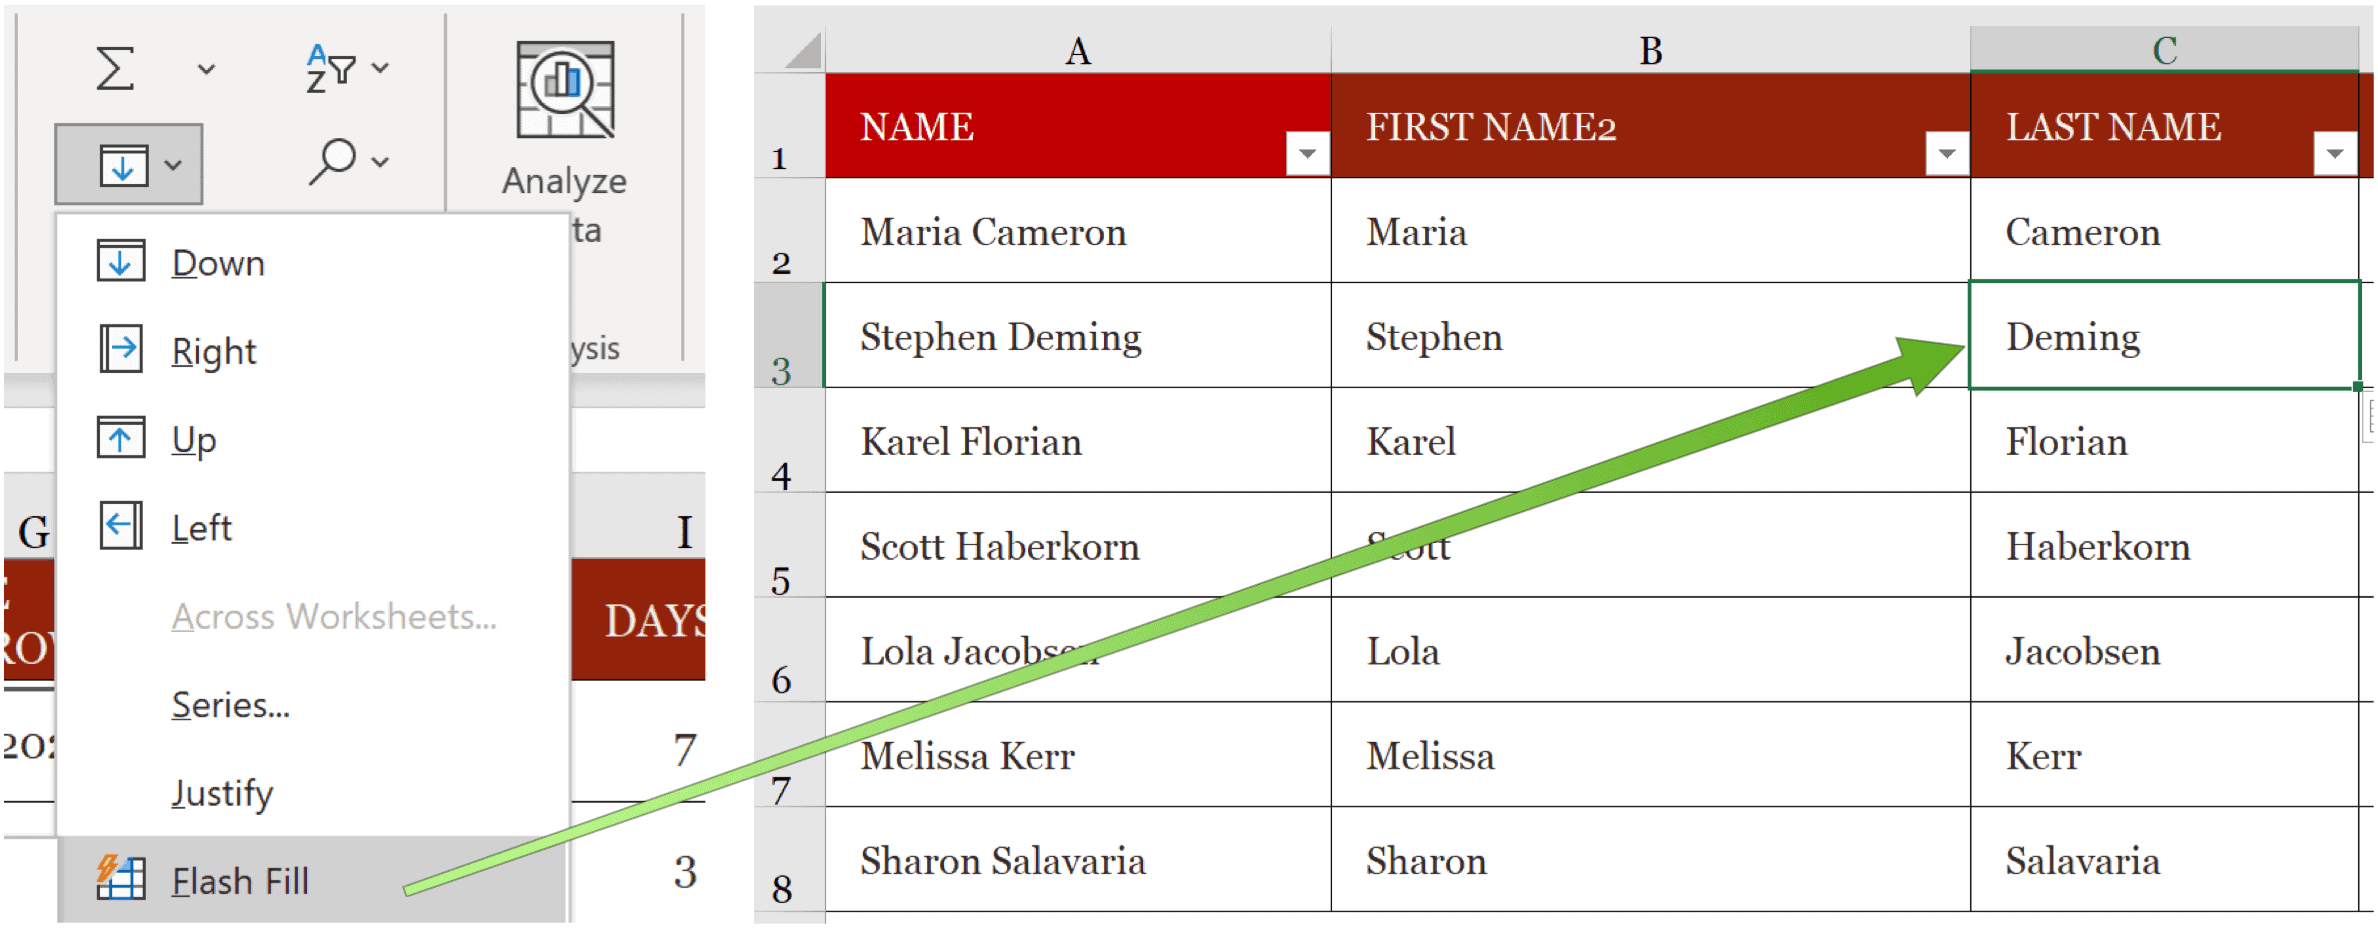
- Hit Enter to move to the next cell down.
- Choose the Home tab on the Excel Ribbon.
- Select Flash Fill under Editing or use CTRL + E on your keyboard.

Excel will automatically fill in the First Name column in our example.
For our second column, we start by typing in the last name of the first contact in the appropriate cell. In this case, C3.
Then:
- Hit Enter to move to the next cell down.
- Choose the Home tab on the Excel Ribbon.
- Select Flash Fill under Editing or use Ctrl + E on your keyboard.
The Last Name column is now filled in.
The Text to Column and Flash Fill tools make it possible to split Microsoft Excel data into more than one column. Personally, I enjoy using the Flash Fill tool much more. However, when you have many cells, Text to Column is probably a better solution.
Are you looking for new tools to explore in Microsoft Excel? We have you covered. Recently, we showed you how to export contacts from an Excel worksheet to Outlook, insert bullet points, wrap text, and more.
Microsoft Excel is part of the Microsoft 365 suite, which for home use is currently available in three varieties, including a Family, Personal, and Home & Student plan. The first is priced at $100 per year (or $10/month) and includes Word, Excel, PowerPoint, OneNote, and Outlook for Mac, and is useful for up to six users. The Personal version is for one person and is $70/year or $6.99 per month. The student plan is a one-time purchase of $150 and includes Word, Excel, and PowerPoint.
Business users can select from Basic, Standard, and Premium plans, starting at $5 per user/month.


