How to Shorten a Video on iPhone

Long iPhone videos can have very large file sizes. If you want to trim them down, here’s how to shorten a video on iPhone.
If you’re anything like us, you’ll have a ton of videos on your iPhone that has three seconds of great content sandwiched between several seconds of nothing much at all. With iPhones able to shoot video in 4K at 60 fps, those wasted seconds of video can soon add up to a lot of precious storage space.
Thankfully, it’s easy to cut your videos down to the appropriate size directly on your iPhone using one of the pre-installed apps. Here’s how to shorten a video on your iPhone.
How to Shorten a Video on iPhone Using the Photos App
If you just want to trim down a video to leave a single shorter continuous section of the original, you can do this directly in the Photos app on your iPhone. This allows you to quickly change the start and end points for your video.
To shorten a video on an iPhone in the Photos app:
- Open the video that you want to shorten in the Photos app.
- Tap Edit in the top right-hand corner of the screen.

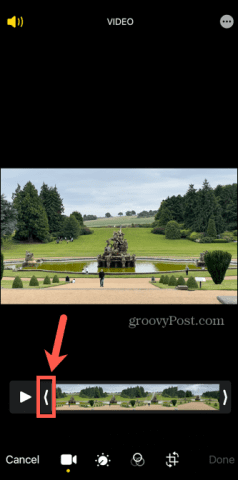
- You will see the timeline for your video at the bottom of the screen.
- To change the start point of your video, tap and hold onto the button at the left-hand end of the timeline. Drag the slider to the position that you want.

- To position the start point more accurately, move the slider to roughly the position that you want, then stop moving your finger but keep it held down on the screen. The timeline will now zoom in, allowing you to position the start point more precisely.

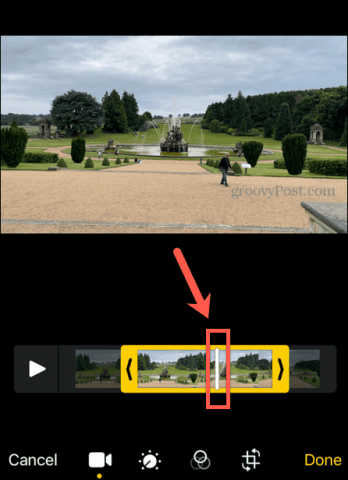
- To change the end point of your video, tap and hold onto the right-hand end of the yellow box and drag the slider to the position that you want.
- To view your edited video, press the Play icon.

- You can scrub forward and backward throughout your selection by tapping and holding the white Play Bar and dragging it left or right.

- Once you’re happy with your edits, tap Done.
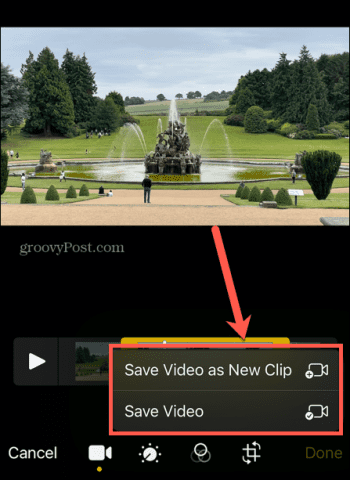
- You now have the option to overwrite the original video with your edited version or save your edit as a new clip.

- Your shortened video will now be saved.
- If you overwrote the clip, you can undo your changes by tapping Edit again and selecting Revert.


How to Shorten a Video on iPhone in iMovie
If your video contains several sections that you want to keep, but you want to cut out certain sections, then this isn’t really possible in the Photos app. However, you can use the iMovie app that comes pre-installed on your iPhone to make more complex edits instead.
To shorten a video on iPhone in iMovie:
- Open the iMovie app on your device.
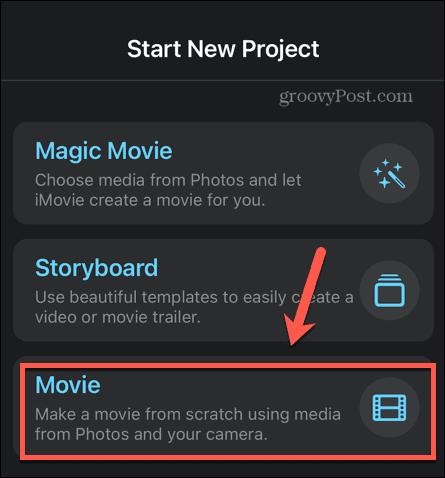
- On the Start New Project screen, select Movie.

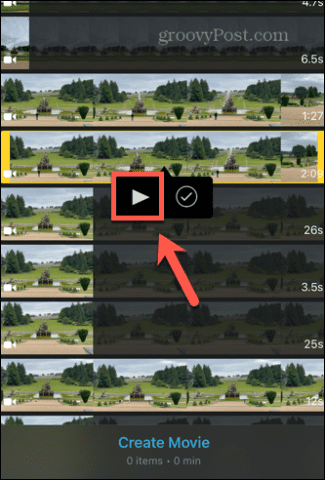
- Look for the video clip that you want to shorten. In the list of clips, you can tap the play button to watch the video.

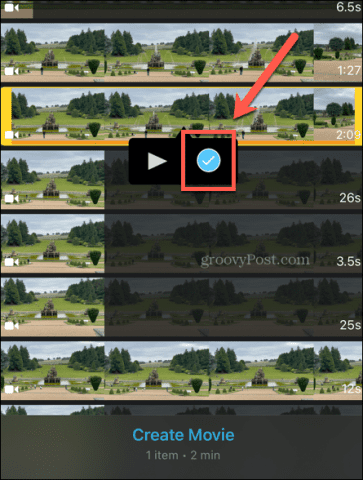
- When you’ve found the video clip you want to use, tap the Check Mark to select it.

- Tap Create Movie and your video clip will be imported into iMovie.
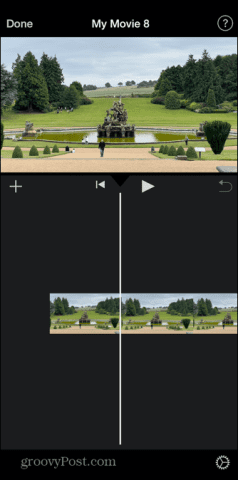
- You’ll see the timeline for your video in the bottom half of the screen. You can swipe left and right to scrub through the clip.
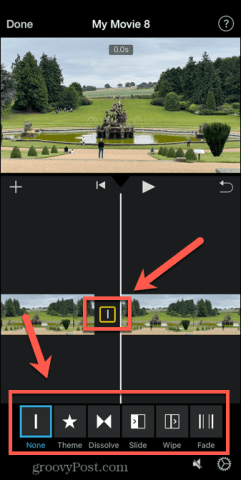
- Tap on the timeline, and a yellow box will appear around the clip.

- Drag the edges of the box to edit the start and end points of your video.
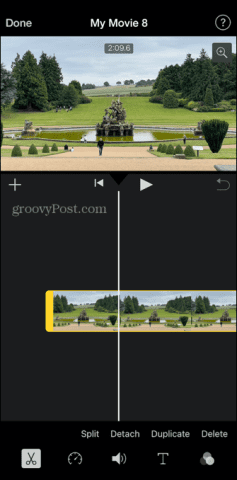
- If you want to cut out a section from the middle of your clip, drag the timeline to the appropriate place, and tap Split.

- The clip will split into two sections. You can tap on each and edit the start and end points of both clips.

- If you want to remove a clip entirely, tap on it and select Delete.
- Tap the symbol between your clips to choose the type of transition that you want.

- You can split each clip into further clips to remove other sections of your video.
- Tap Done in the top left-hand corner of the screen to save the changes.

- At the bottom of the screen, you can tap the Play symbol to watch your edited video in full screen. Tap the Trash Can icon to delete it.

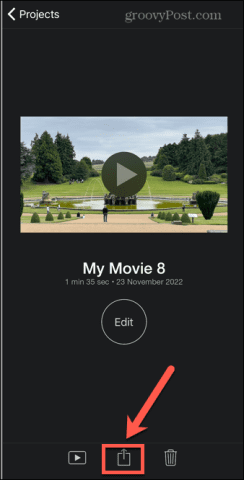
- To save your video, tap the Share icon.
- Scroll down and select Save Video.

- Your edited video will be exported and will save to your camera roll.


Get More From Your iPhone Camera
Learning how to shorten a video on your iPhone allows you to save precious storage space on your iPhone. It can also help you to cut out the boring parts of your videos and just leave the important action.
You can use your iPhone to take incredible photos and shoot high-quality 4K videos. If your photos aren’t as good as you would like, there are plenty of tips that can help you take better photos with your iPhone camera. If your perfect portraits are being ruined by your flash, you can fix red-eye on your iPhone too.
Don’t forget that, if your video feels a bit too slow, it’s possible to speed up a video on your iPhone.


Herful
February 16, 2023 at 8:35 pm
nice