
For Windows users, the practice of evaluating pre-release versions of the operating system is a common past time. Apple users, on the other hand, are just becoming familiar with the activity of dual booting. Previously, developer previews of Apple platforms such as OS X and iOS were limited to registered developers who paid for the privilege.
Since the release of OS X Mavericks, the company has opened its pre-release programs to the public. Millions of Mac users can now sign up and install beta versions of these popular platforms before they become available. There are benefits too; you can help find bugs and send in feedback. Sometimes your feedback might not actually result in a design change request, but can later show up in future revisions.
Setup a Partition on Your Mac and Install macOS Preview
Note: Some of the information in this article references macOS 10.12 and earlier, but the same instructions apply to installing the latest preview.
At WWDC, Apple announced the next revision of its client operating system. The OS X brand, which has been with us since 1999 has finally been retired. The intention is to align the branding with Apple’s three other platforms, watchOS, iOS, and tvOS. MacOS Sierra includes exciting improvements. The Siri digital assistant is now available on the Mac. Sierra includes new improvements for automating the maintenance of your Mac by deleting duplicate files and syncing older files to iCloud. In this article, we show you how you can setup your Macintosh to try out the new version.
There are multiple ways to test macOS preview, one of which is a virtual machine. Because virtual machines tend to be limited and carry some overhead, a partition is more advantageous. Benefits include full access to the hardware: CPU, Memory, and Graphics. Also, a dual boot configuration keeps both operating systems separate from each other. Let us show you how to do it.
Find Out if Your Mac can Run macOS Preview
Apple has done an exceptional job of supporting old hardware. Like its predecessor, the macOS High Sierra upgrade for the first time in a few years breaks support with older Macs. Here is a list of supported Macs.
- MacBook (late 2009 and later)
- iMac (late 2009 and later)
- MacBook Air (2010 and later)
- MacBook Pro (2010 and later)
- Mac Mini (2010 and later)
- Mac Pro (2010 and later)
Backup your Mac
If you are new to dual booting or making modifications to your Mac such as creating a partition, then you should create a thorough backup. Check out our previous article for instructions how to use OS X’s Time Machine software to back up your Mac.
Create a Partition
After determining if your Mac can run Sierra, our next step is to set aside some space to install the operating system.
Press Command + Space on your keyboard then type disk utility then double click it.

Select your storage device in the inspector window then click the partition tab. For my setup, I will allocate 50 GBs space. If you plan on testing macOS High Sierra regularly including the installation of applications, then the more, the better. You can resize the partition multiple ways; you can drag the slider on the pie chart or enter the amount in the Size field manually. Click Apply to confirm changes.
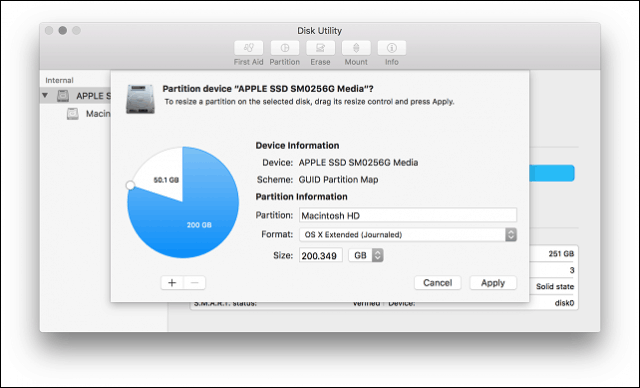
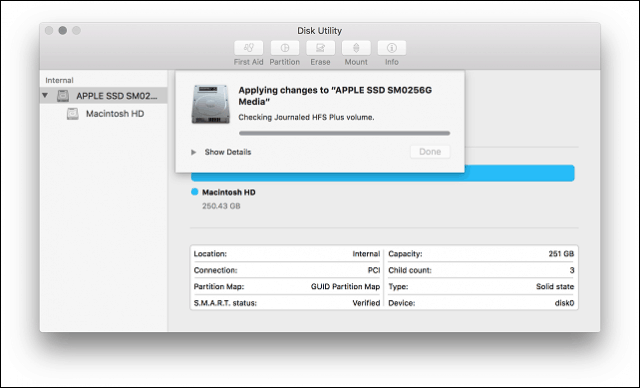
Wait while OS X resizes the partition and then click on the done button when it’s finished.
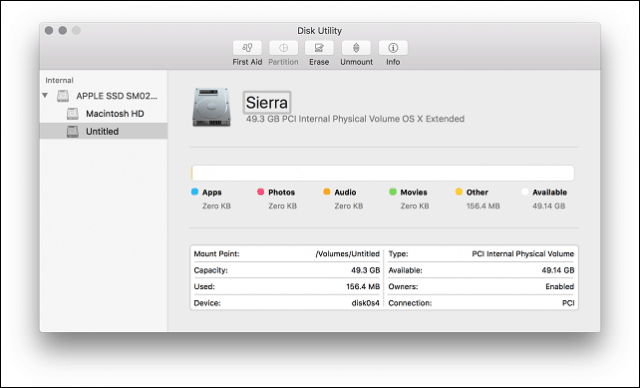
The new partition will be listed in the inspector window as untitled. Click on it then enter an appropriate label.
Installing macOS Sierra
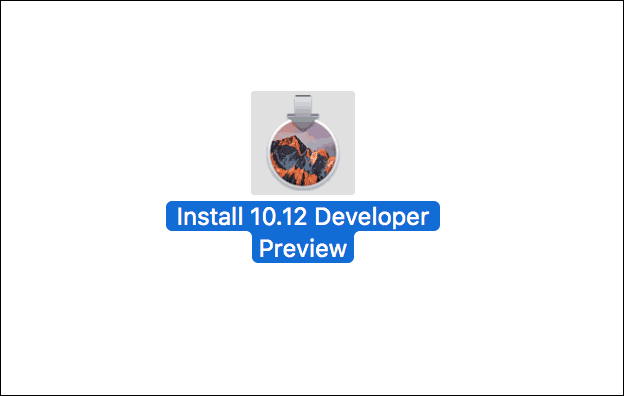
If you have your macOS High Sierra install file ready, double click on it and work through the wizard. Including accepting the EULA.
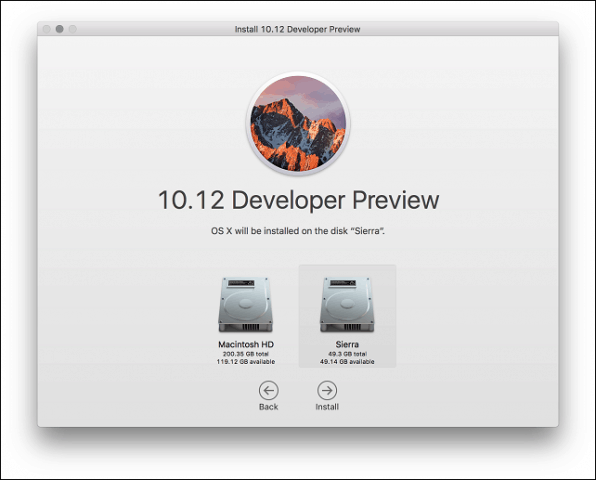
Click Show all disks then select the High Sierra partition you created earlier.
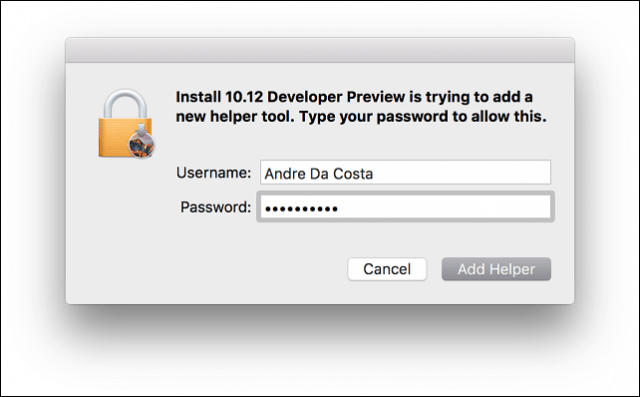
Enter your password then click Add Helper.
Wait while High Sierra copies files, the installer will restart automatically then continue installation. The installation can take anywhere from 15 to 25 minutes depending on your hardware.

When setup is complete, you will be prompted to setup a user account, choose your time zone and enable Siri.
That’s it! macOS is now installed.
If you want to try out Siri, you’ll need to be connected to the Internet. You can launch it by pressing Fn + Space key or click Siri in the Dock or menu bar.

How to Switch Between macOS Installations
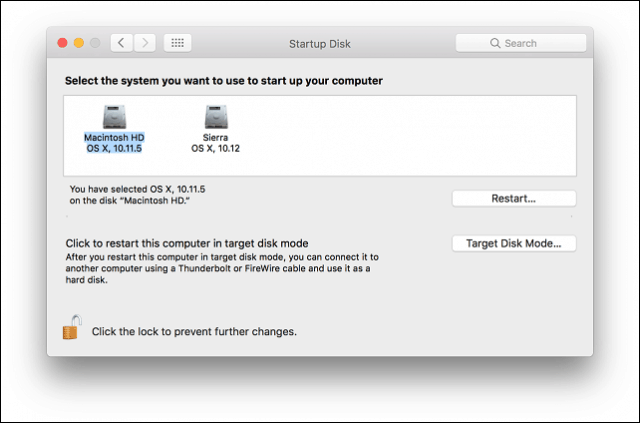
If you would like to change between installations, launch System Preferences > Startup Disks > click unlock > enter your password. Select the desired operating system then click Restart, then click Restart again. You can also hold down the Option key after you hear your Mac’s boot chime then select the startup disk.
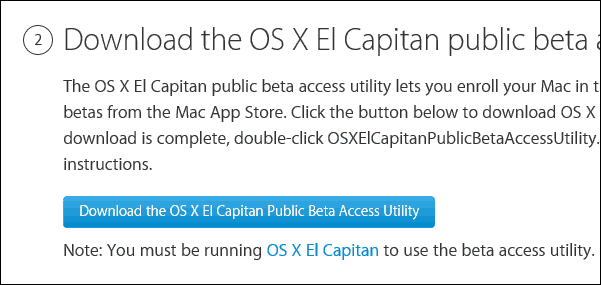
How to Get the macOS Beta?
If you don’t have access to the beta, you can install another copy of macOS on the High Sierra partition, which you can download from the App Store. Go to https://beta.apple.com then sign in with your Apple ID. I recommend you create a separate Apple iCloud ID for testing Sierra.
After logging in, click the Enroll your devices tab. Scroll down and then select the macOS Public Beta Access Utility button. Double-click the OSXElCapitanPublicBetaAccessUtility.dmg file and follow the on-screen instructions. When you check the Store for updates, macOS High Sierra will be offered, or you will be notified of its availability.
Tell us what you think of the new OS.


