How to Move Default User Folders on Windows 11

For easier file management or to save space, you can move default user folders on Windows 11 to a different location. Here’s how.
Every new installation of Windows 11 includes default folders, including Documents, Pictures, Music, Videos, Desktop, and Downloads. While convenient, these folders can grow over time and take up a lot of drive space.
If you’re dealing with limited storage on your PC, you should consider relocating certain folders to an external drive to free up valuable disk space and enhance your operating system’s performance.
Moving default user folders requires more than a simple drag and drop (which only creates a shortcut). Learn how to move default user folders on Windows 11 using the steps below.
How to Move Default User Folders on Windows 11
Moving default user folders on Windows 11 is straightforward; however, it requires a few important steps. Moving a folder to a high-capacity external drive will help free up space on your local drive.
Note: You can only move files not backing up with OneDrive (default). So, you will need to disable OneDrive before moving the user folders.
To move default user folders on Windows 11:
- Launch File Explorer and browse where you want to move the folder.
- Click New > Folder from the File Explorer toolbar.

- Name the folder the same name as the default for easy management. For example, we are moving the Pictures folder, but you can create others if needed.
Note: The Ctrl + Shift + N keyboard shortcut allows you to create other new folders quickly.
- Press the Windows key + R shortcut to launch the Run dialog.
- Type %HOMEPATH% and press Enter or click OK.

- The location of your default folders will open.
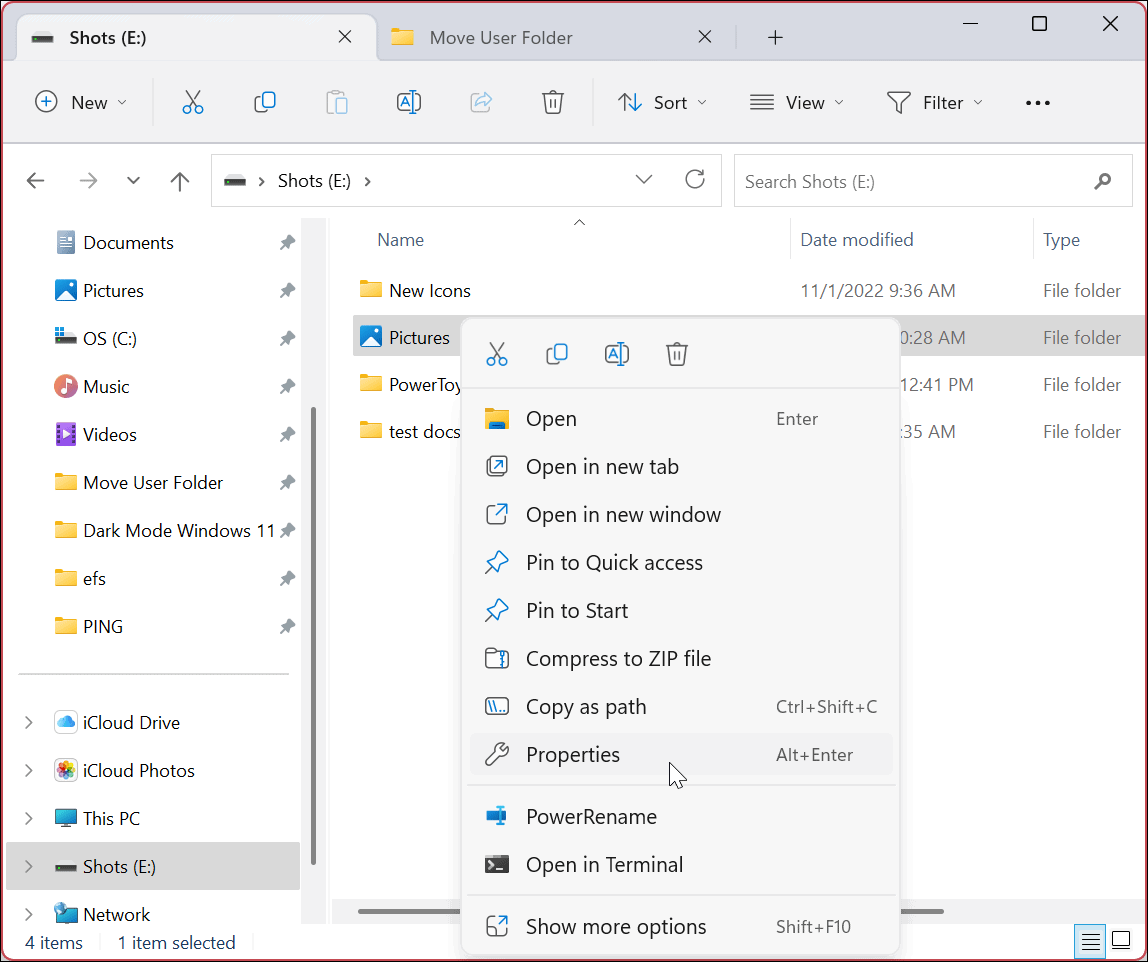
- Right-click the user folder you want to move and select Properties from the context menu.

- Click the Location tab at the top, followed by the Move button.

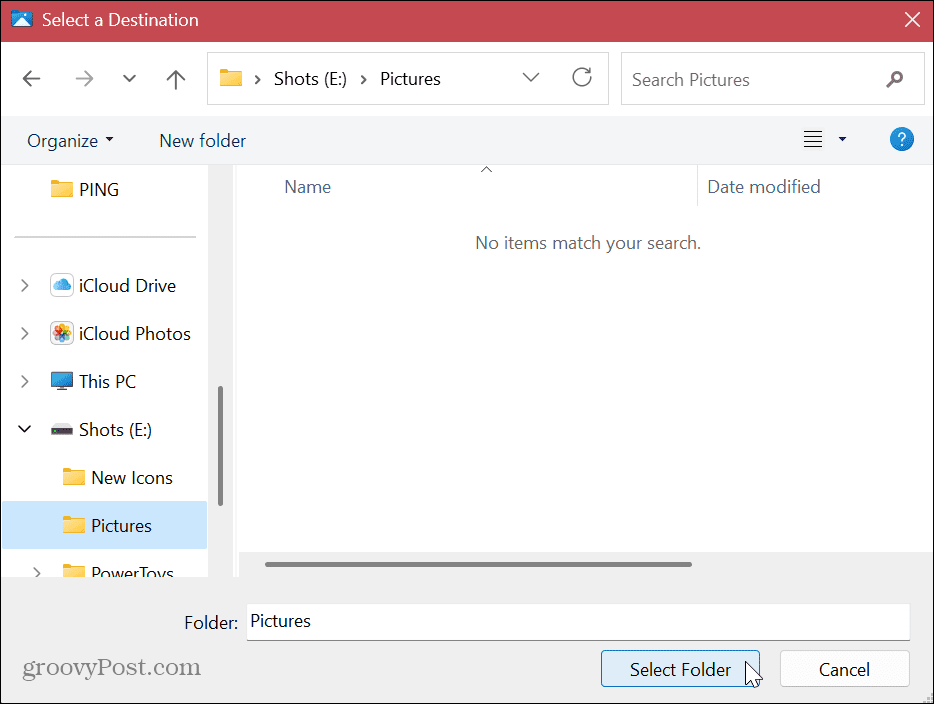
- Navigate to the location where you are moving the folder and click the Select Folder button.

- Click the Apply button in the folder’s properties window.

- Click Yes when the verification message appears.

- The folder will be moved to its new location. Click OK when the process is complete.
Note: The amount of time it takes to move will vary based on the folder size and your system hardware.


Once you complete the steps, the default user folders will be in the new location. And moving forward, new files will save to that location by default (unless you change the default save locations within an app). Follow the above steps for each default folder you want to move to a new location.
How to Restore Default User Folders on Windows 11
There might come a time when you no longer want to use the new location for your default user folders. In that instance, you can revert the changes easily. This will restore the folder you moved to its original default location.
To restore default folder settings on Windows 11:
- Launch File Explorer and browse to the new folder’s location.
- Right-click the folder you want to restore the location for and select Properties from the menu.
- Select the Location tab at the top and click the Restore Default button under the folder’s path when the folder properties window opens.

- Click the Apply button and click the Yes button when the notification appears.

- Click OK to complete the process.


The user folder will be restored to its original default location. If you want to move other folders, follow the same steps outlined above.
There are a few things to mention about moving default user folders. For example, if you move the folder to an external drive, those files will be inaccessible when the drive isn’t connected to your PC. Instead, you’ll need to reconnect the drive and potentially change the folder’s path again if Windows assigns it a different letter.
One of the things you can do to help prevent that type of problem is to assign a permanent drive letter to the removable drive (X, Y, or Z). If you move the drive to a different partition, that is less of an issue.
Managing Files and Folders on Windows 11
Changing the default user folders can help regain space if you have a low-capacity drive. If you need to revert the change, it only takes a few clicks following the above instructions.
If you’re troubleshooting your PC, you might need to show hidden files and folders so you can see specific system files. Another great feature Microsoft introduced is File Explorer tabs for improved file and folder management.
If you are not on Windows 11 yet, check out how to hide files and folders on Windows 10 to prevent other users from seeing them. In addition, if you need to keep your data private, learn about encrypting files and folders on Windows 10.


Patty
February 20, 2024 at 11:17 pm
THANK YOU for this! I recently purchased a Dell Inspiron with a 256 GB solid state drive and a 1 TB “regular” hard drive. What I didn’t realize was that the SSD was the C: drive, and the “regular” hard drive was the D: drive. I have been using the C: drive for EVERYTHING since the C: drive was invented. So when I tried to copy my music (141 GB) to my computer and got the “you don’t have enough room for this,” I wigged out a little. (OK, I wigged out A LOT.) I figured out the whole C: D: thing, but I knew I couldn’t just add documents, music, pictures, etc. folders to D: because the DEFAULT folders were on C:, so every time I would download something (or whatever), it would go to the default, and the next thing you know, it’s full, and I’m screwed. I don’t even know what I googled to find this article, but thank goodness I did, because it worked perfectly. (Other than a big ol’ snafu with the Pictures folder, which was [you guessed it] on OneDrive. I have some choice words about OneDrive. But I finally got that working, too.) Seriously, I can’t thank you enough.
Jeff Butts
February 21, 2024 at 1:10 am
Hi Patty! So glad this helped you. Thanks for reading and for letting us know how it worked out for you.