How to Make One Page Landscape in Microsoft Word

If you’re creating a Word document with multiple page layouts, you may wish to make just one page landscape. Here’s how.
When you’re creating Word documents, you have two-page layout options available—landscape or portrait. Portrait mode is the default option, but you can switch to landscape mode instead if you want your text sideways. If you want to use both types of layouts in Word, you’ll need to use a few workarounds using section breaks and Word’s page formatting options to do so. Here’s how you can make just one page landscape orientation in Word.
How to Make One Page Landscape in Word
If you want to quickly make one page landscape in Word, here’s what you’ll need to do.
- Open your Word document and place the blinking cursor at the start of the page you wish to change to landscape mode.
- Click on the Layout menu in the ribbon bar.
- Select Breaks > Next Page in the Section Breaks section. This will insert a section break and push your text onto a new page.

- In the Layout menu, choose Orientation > Landscape. This will switch the current page and all the following pages to landscape mode.

- You’ll now need to turn the remaining pages back to portrait mode. Scroll down to the next page, then place the blinking cursor at the start of the page.
- Choose Layout > Breaks > Next Page to insert a new section break.
- Click on Orientation > Portrait to switch the pages to portrait mode.


If you followed the steps correctly, you should now have one single landscape page, with all other pages remaining in portrait mode.

How to Make Specific Text Landscape in Word
If you don’t want all of the text on your page to appear on the landscape page, you can choose to make a landscape page that only contains specific text.
- To do this, start by highlighting the text that you want to appear on the landscape page.

- In the Layout menu, click on Margins, then select the Custom Margins… option at the bottom of the drop-down menu.

- In the Page Setup window, click on the Landscape option in the Margins tab, under the Orientation section.

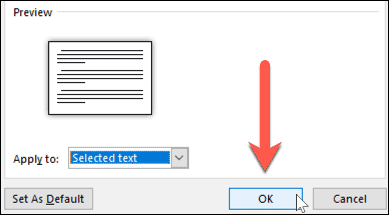
- In the Apply to box, choose Selected Text.
- Click OK to confirm the settings you’ve selected.


You should now have a landscape page that contains the text you previously highlighted, creating a section break that uses a different page layout to the rest of your Word document.
You can use this method to turn an entire page landscape—to do this, select all of the text on the page before you start and repeat the steps above to complete the change.
Formatting Microsoft Word Documents
Now that you know how to make a single page landscape in Word, you can start creating documents with as many combinations of landscape and portrait pages as you want. Using the above steps will allow you to format your Word documents and make one page display in Landscape Mode. Easy!


