How to Insert and Format the Current Date and Time in Google Sheets

Add the current date and time in Google Sheets, so you’re up to date when you open your spreadsheet. Then, format it exactly as you like.
If you have a spreadsheet where you want to view the current date with or without the time, you can do this easily in Google Sheets. This is handy if you always want the date and time displayed when you open your sheet.
What’s nice about these date and time features in Google Sheets is that you can format them the way you want. This gives you the flexibility to make your sheet work and look the way you want.
One thing to keep in mind is that the functions you’ll use update automatically each time you open your spreadsheet.
Insert the Current Date
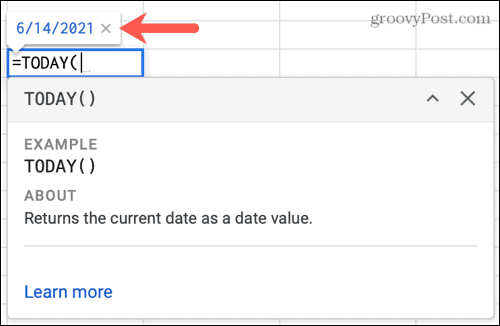
To display the current date without the time, you’ll use the TODAY function. Select the cell where you want the current date and type:
=TODAY
You’ll see a screen tip letting you know what the function does, which displays the current date.


Hit your Enter or Return key or click the screen tip, and you’ll see the format for the date.


Press Enter or Return to apply the function to the cell.


Insert the Current Date and Time
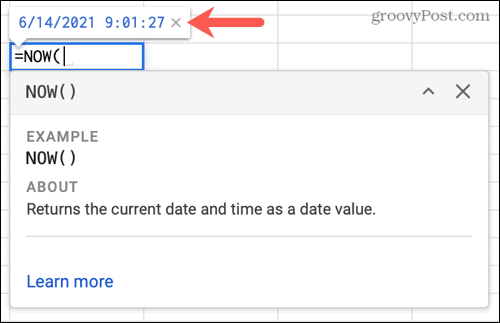
If you prefer to display the current date with the time, you’ll use the NOW function. Select the cell where you want the current date and time and type:
=NOW
Again, you’ll see a screen tip explaining the function.


Hit Enter or Return or click the screen tip to display the format for the date and time.


Then, press Enter or Return to apply the function.


Format the Current Date and Time
Whether you use the TODAY or NOW function, you can customize the format. You can choose from a preformatted option or create your own.
Select the cell containing the current date and/or time that you used above. Then, click Format > Number from the menu. In the pop-out menu, you’ll see a few quick options you can select.


For additional options or create a custom format, click More formats > More date and time formats at the bottom of the pop-out menu.
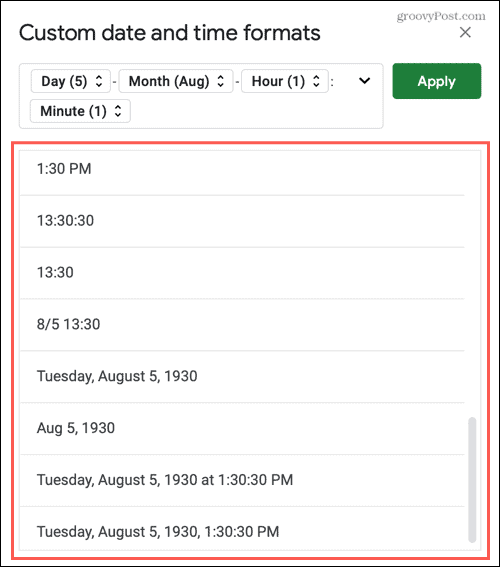
In the window that displays, you can choose from many preformatted options at the bottom. If you want to use one, select it and click Apply.


Create a Custom Format
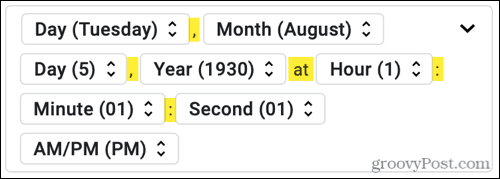
If you prefer to create a custom format, you can do so at the top of the window. You can start with an option at the bottom and make changes to it for a jumpstart.
Each element at the top can be customized or removed. Click one to pick a different format option or choose Delete to remove it.


To add an element, place your cursor in the box where you want it. Then, click the arrow on the top right. Choose the element you want to add, and it will pop into place. You can then select it to choose its format.


The custom format you create will display exactly as shown in the box. So you can add things like commas, colons, and words between the elements.


When you finish, click Apply, and you’ll see your new format in the cell with the date and/or time.


Stay Current in Google Sheets
Once you add the current date or current date and time function to Google Sheets, it will update each time you open your spreadsheet. So you’ll always have the latest date and/or time in your sheet.
For other helpful functions, take a look at how to use IF statements or the VLOOKUP function in Google Sheets.
Leave a Reply
Leave a Reply


