How to Insert an Image Into a Shape in PowerPoint

Inserting an image into a shape in PowerPoint can be a good way to resize it or make it fit your presentation’s theme. This guide explains how.
Images are a great visual method for conveying information. If you’re creating a PowerPoint presentation, images allow you to show or emphasize a point you’re making without relying on text.
If you want to take things further, you could insert an image into a shape in PowerPoint. Adding images to shapes can help you to insert images that match your design or theme, for instance.
If you’re unsure how to insert an image into a shape in PowerPoint, follow the steps below.
How to Insert an Image into a Shape in PowerPoint
Inserting an image into a shape can be useful for creating a visual element that stands out in your presentation. It could be an arrow, a heart, or a cross, but each of these shapes offers a purpose or emotion that can help your images pack a punch.
If you’re unsure how to insert an image into a shape in PowerPoint, follow these steps:
- Open your PowerPoint presentation.
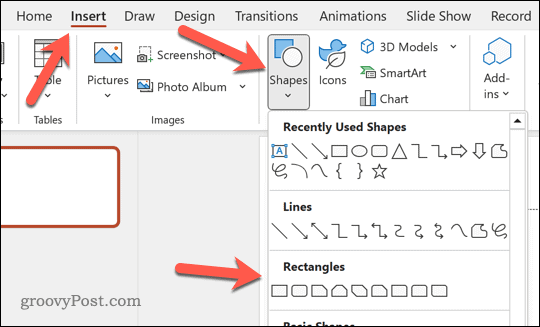
- Click the Insert tab in the ribbon.
- Click Shapes.
- Select the desired shape and draw it on the slide.

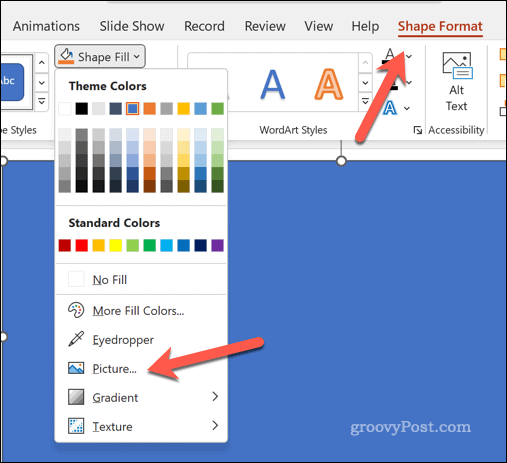
- Next, select the shape you drew and then select the Shape Format tab on the ribbon bar.
- Click Shape Fill.
- From the Shape Fill drop-down menu, select Picture.

- On the Insert Pictures dialog, select one of the options to locate and insert your image. You can choose from your PC, online images, or an image from PowerPoint’s stock image library.
- Once you’ve selected your image, click Insert.

- The image will fill the shape. To adjust how this is done, click the image inside the shape and click the Picture Format tab on the ribbon bar.
- Click the arrow on the Crop button and select Fill (to stretch the entire image to fill the shape) or Fit (to use the existing image size to fill the shape).


How to Crop Images as Shapes in PowerPoint
You can also crop images as shapes in PowerPoint. By doing this, your image will be cropped to match that image shape.
To crop images shapes in PowerPoint:
- Open your PowerPoint presentation.
- Insert the image into your PowerPoint presentation by clicking the Insert tab and clicking Pictures.
- Select where to Insert Picture From.

- Use the on-screen options to choose the location for your image, including from your PC, from online sources, or the stock library.
- Once the image is inserted, select it and click the Picture Format tab on the ribbon bar (if it isn’t automatically selected).
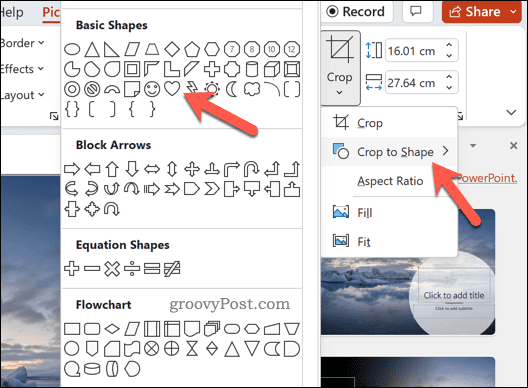
- On the Picture Format tab, click the arrow on the Crop button.
- From the drop-down, hover over Crop to Shape.
- Select one of the shapes to crop the image to match.


If the image quality is poor, you may consider using a higher-resolution image. You should also consider the aspect ratio of your image to ensure that the image shape and design aren’t negatively affected by the shape you chose to use.
Creating Powerful PowerPoint Presentations
Using the methods described above, you can easily insert an image into a shape in PowerPoint. However, there are other techniques you can use to enhance your PowerPoint slides.
For example, you can use the master slide to quickly apply consistent formatting and design elements to your presentation’s slides. You can also add a video to PowerPoint to create a more dynamic and engaging presentation.
If you need to share your presentation with a wider audience, you can use the broadcasting feature in PowerPoint to present your slides online. And if you want to emphasize certain points in your presentation, you can use the highlighting feature in PowerPoint to draw attention to specific text on your slides.


