How to Export Contacts from an Excel Worksheet to Outlook

Yes, you can export contacts from that lengthy Excel spreadsheet into Microsoft Outlook. Doing so takes only a few steps.
Microsoft Excel offers a great way to store and maintain contact information for business or personal use. However, the time may come when you want to use that information in Microsoft Outlook. Here are the steps to export contacts from one app to another using Outlook 2013, Outlook 2016, Outlook 2019, or Outlook for Microsoft 365 for Windows.
Prep to Export Contacts
Moving contact information from Excel to Outlook requires saving your spreadsheet as a .csv file. Be sure to click the worksheet within a multiple-sheet spreadsheet before getting started.
- Click File > Save As in Microsoft Excel. On some versions, it’s File > Save a Copy.
- Choose the location to save your file.
- Select CSV (Comma delimited) (*.csv) in the Save as type box.
- Click Save.
- Choose Got It in the box, if applicable.
You now have a copy of your spreadsheet in .cvs format; the original file has not been affected and is closed.

You should now close the .cvs file.
Importing into Outlook
Follow these directions to bring the contents of the recently created .cvs file to Outlook.
- Choose File in Outlook.
- Select Open & Export.
- Click Import/Export.

Next:
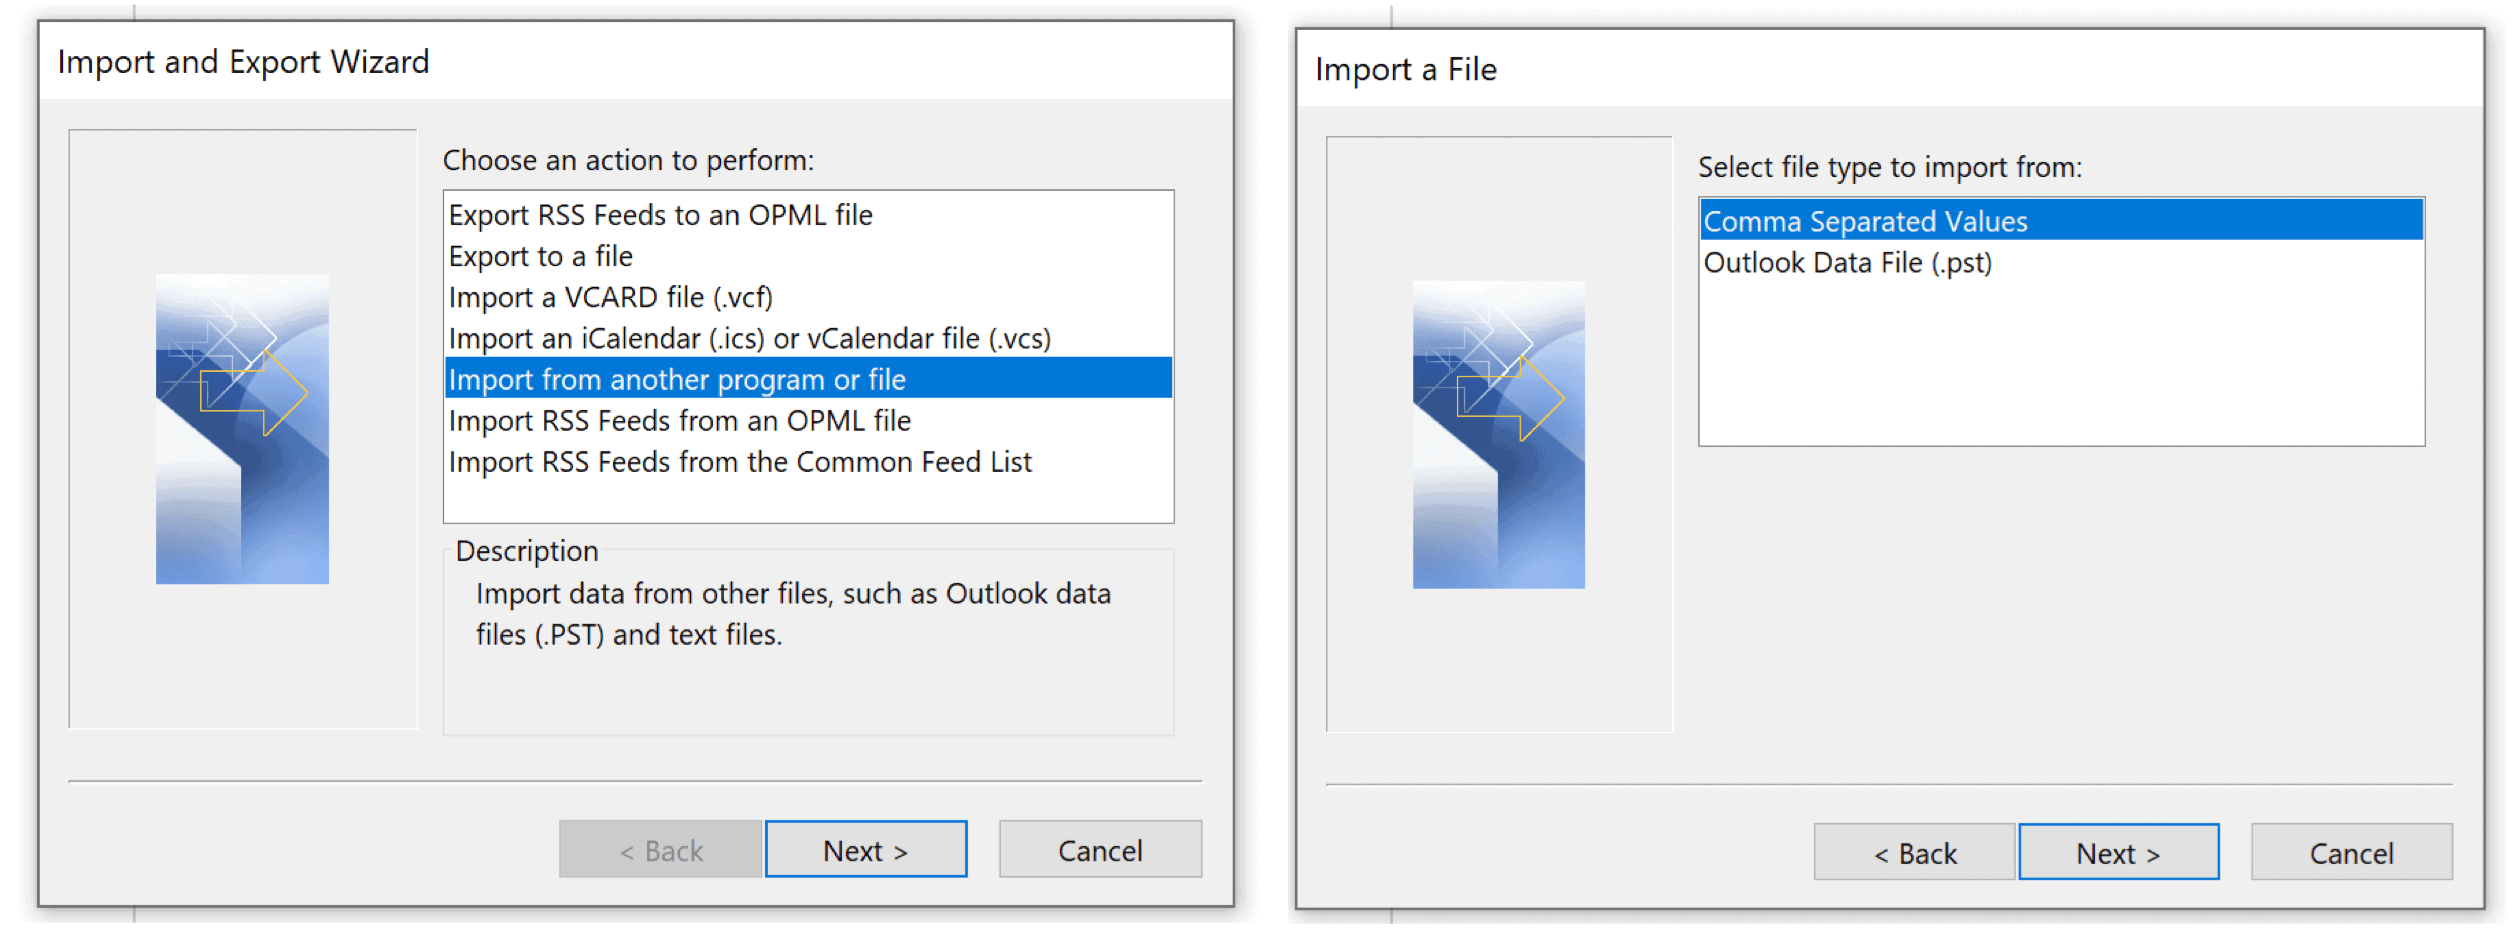
- Choose Import from another program or file.
- Click Next.
- Select Comma Separated Values.
- Click Next.
Next:
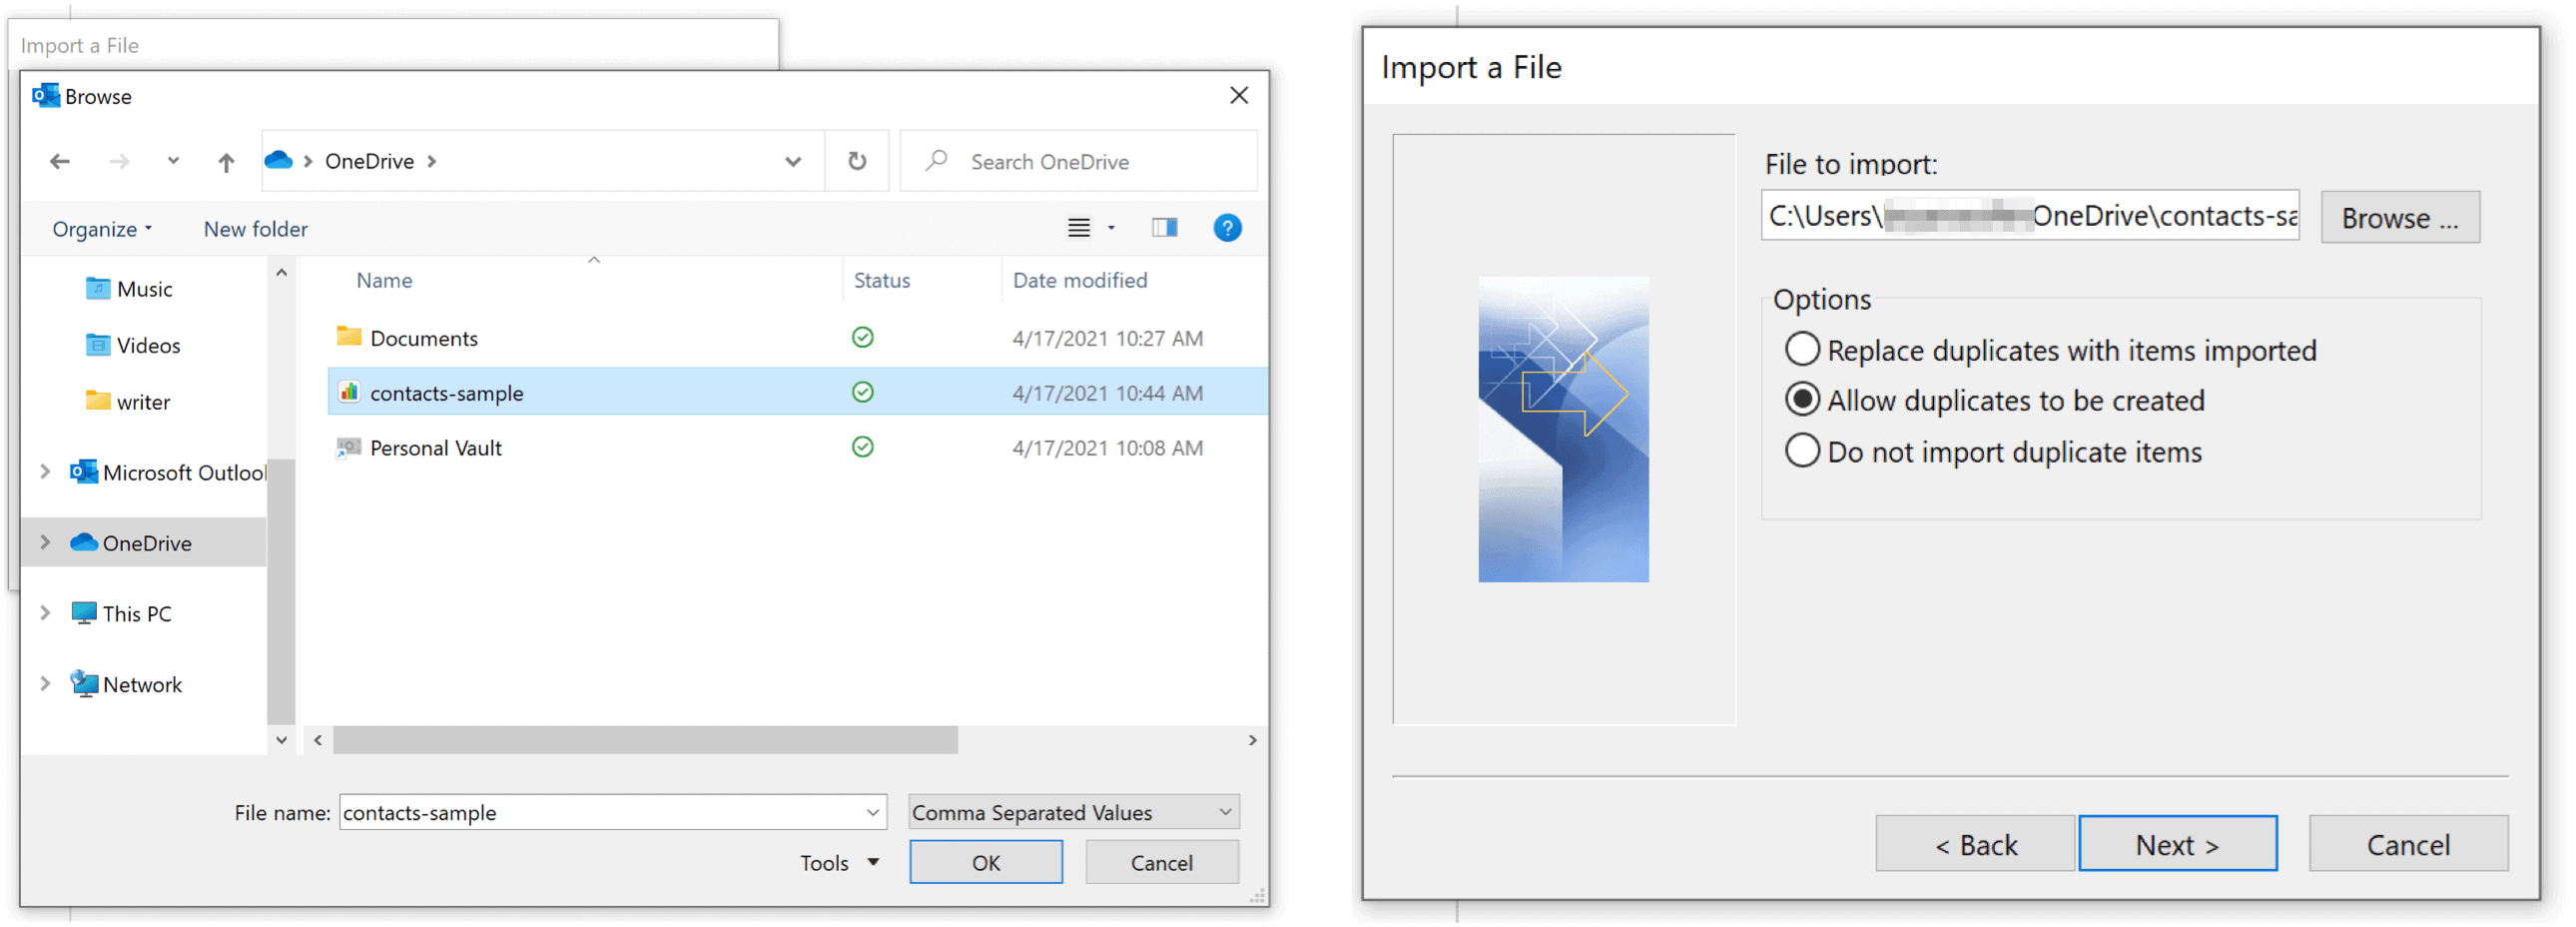
- Choose the Browse button, and select your recently created .cvs file.
- Click OK.
- Under Options, choose whether to replace duplicates (existing contacts), create duplicate contacts, or not import duplicates.
- Select Next.
Next:
- Choose the destination folder for your contacts. Contacts should be selected by default. If it’s not, scroll up or down to find it. You can also use another folder or create a new one.
- Click Next.
- Be sure the check box next to Import “[File name].cvs” is selected.

Mapping Fields
The final step is to “map” the fields in your .cvs file to the contact fields in Outlook. Don’t hit to Finish button until after setting this up (see below).
- Click the Map Custom Fields button.
- Map the fields on the left side (the .cvs file) to the right side (the fields in Outlook) by dragging each field. For example, match “Work Phone” to “Business Phone.”
- Repeat for each field.
- Choose OK when finished.
- Select the Finish button.
You have now imported contacts from a Microsoft Excel spreadsheet to Microsoft Outlook. Click the People icon at the bottom left to see the contacts you imported.

Obviously, you can do more than export contacts in Microsoft Excel. We recently told how you could add bullet points in the spreadsheet powerhouse and wrap text. There are also articles on filtering unique values in Excel and locking certain cells, rows, or columns.
For home use, the Microsoft 365 suite is currently available in three varieties, including a Family, Personal, and Home & Student plan. The first is priced at $100 per year (or $10/month) and includes Word, Excel, PowerPoint, OneNote, and Outlook for Mac, and is useful for up to six users. The Personal version is for one person and is $70/year or $6.99 per month. The student plan is a one-time purchase of $150 and includes Word, Excel, and PowerPoint.
Business users can select from Basic, Standard, and Premium plans, starting at $5 per user/month.


