How to Encrypt Individual Files and Folders in Windows 10

Encryption is one of the best ways to keep files and folders private and secure on your PC. Here’s how to use the built-in encryption technology in Windows 10.
Using encryption is one of the best ways to keep your most important files and folders private and secure. You could use either a free or paid utility to get the job done. However, if you don’t want to deal with the cost and learning curve of another app, Microsoft has your back. Windows 10 includes built-in encryption technologies like BitLocker and Encrypting File System (EFS).
Encrypt Files or Folders in Windows 10 Using EFS
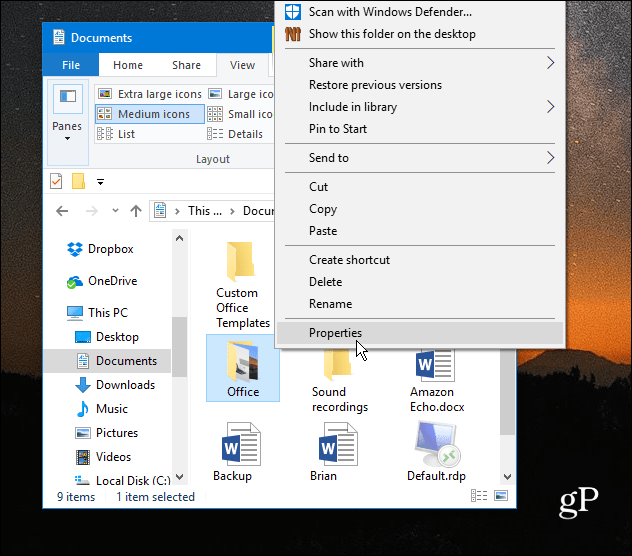
Launch File Explorer and right-click the file or folder you want to encrypt and select Properties. In this example, I’m going to use a folder that contains subfolders and individual files.
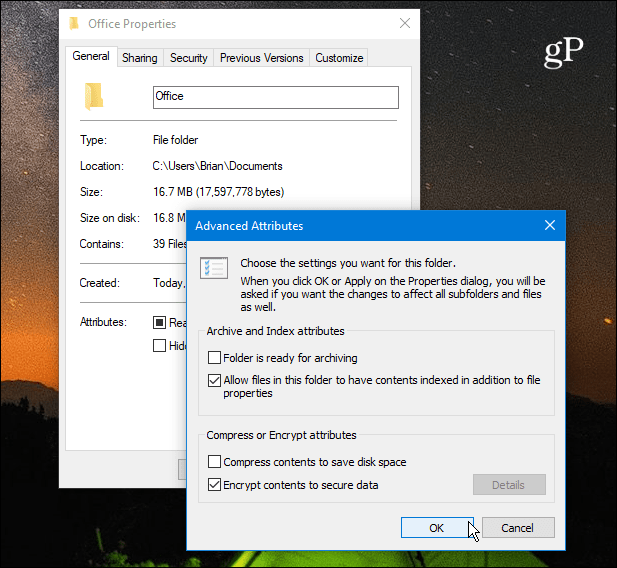
In the Properties window, under the General tab, click the Advanced button.

Next, check the box next to Encrypt contents to secure data under the Compress or Encrypt attributes section and click OK.
Click OK again and Windows will ask you to confirm whether you want to encrypt the single folder or the folder, subfolders, and files. Once you make your selection click OK.

That’s it. You will notice that all your encrypted files will display a small padlock icon in the top-right corner of the icon.

Back Up Your EFS Encryption Key
The encrypted files and folders can only be accessed using your Windows login credentials. However, the key used to unlock the encrypted data is stored on your local drive and it’s very important to back up that encryption key certificate. If disaster strikes and the drive becomes corrupted, you need to have a backup.
Use the keyboard shortcut Windows Key + R to bring up the Run box and type: certmgr.msc and hit Enter or click OK.

In the right pane go to Personal > Certificates and select all certificates for Encrypting File System that are listed under the Intended Purposes column. Right-click the certificate(s) and go to All Tasks > Export.

The Certificate Export Wizard will start – click Next.

Next select the radio button next to Yes, export the private key and click Next.

On the next screen, you can just leave the Export File Format default selections they way they are and click Next.

You’ll be prompted to enter a secure password or passphrase that will be needed to later import the EFS key. Make sure it’s something you will remember as it is not recoverable.

Browse to the location of where you want to securely store the backup and type in a file name for it and click Save.

If the name and path look good click Next. In the example below I’m saving it to a USB flash drive but you can export it to an external hard drive, NAS, network location or whatever works best for you (just make sure it’s secure).

Next, click Finish. You’ve completed the Certificate Export Wizard and the EFS key is safe and secure in case you need to use it later to access your encrypted files or folders.

Summing Up
It is important to point out that EFS isn’t as secure as other encryption methods such as Microsoft’s BitLocker. This is because the key used to unlock the encrypted data is stored on your local drive – which is why you want to back up your EFS Encryption key. If you’re not using Windows 10 yet, check out our article on how to back up your EFS Encryption Key on Windows 7 or 8.1.
There is also a chance that data could leak into a temp file since the whole drive isn’t encrypted. Still, EFS is quick and easy, and unless you have files that contain plans for world domination, it’s quite secure for home users who want to secure personal photos and other important documents.
Do you use Microsoft’s built-in EFS encryption technology or do you prefer a third-party solution? Leave a comment below and let us know. Or, for further discussion, make sure to check out our Windows 10 Forums!


Glenn Charles
August 26, 2017 at 10:33 am
The main problem with MS-supplied encryption is that all apparently have a back door for usage by (hopefully U.S.) intelligence services. The NSA has had the BitLocker back door since it was incorporated in Windows and possibly before. [Note: since the advent of Homeland Security the NSA has fallen to a category that includes military intelligence, the FBI and CIA.
Ziggy
August 27, 2017 at 9:04 pm
Sob… What about Win 10 Home users?
Zeke Krahlin
March 2, 2019 at 8:13 pm
Right, there is no option to encrypt a folder or file…just entire drives.
anon
July 16, 2020 at 4:15 am
The encryption does not work. I encrypted a file using the above steps and I could still open and read the file even though there was a lock on it. I didn’t need to supply the password I made. I then emailed the file and key to a friend to see if it had to do with being my file. He was able to open and read the file even though there was a lock on it. He deleted the supplied key and he was still able to open and read the file. It was not encrypted at all.