How to Disable Superfetch on Windows 11

Is your Windows 11 PC sluggish or experiencing 100% disk usage? You can try and disable Superfetch on Windows 11 to help resolve the issue. Here’s how.
The Superfetch (SysMain) feature was introduced in Windows Vista and remains part of the Windows operating system. It is a built-in service meant to preload frequently used apps in RAM, increase boot times, and improve performance. However, it was mainly introduced for older PCs. It isn’t as needed for modern PCs running Windows 10 and Windows 11.
If you’re getting a sluggish experience (like 100% disk usage) on Windows 11, you can disable Superfetch without any issues. Disabling Superfetch on Windows 11 might improve the performance of your PC overall.
If you’re experiencing a sluggish Windows 11 experience, we’ll show you how to disable Superfetch on Windows 11.
What is Superfetch (SysMain)?
Superfetch, or SysMain as it’s now called, is a service that runs in the background and analyzes your PC usage. The service’s collected data helps Windows determine which app you’re going to select. That, in turn, improves the speed of launching your most used apps.
While it should be fine to keep SysMain enabled, you might want to disable it and see if you’re experiencing sluggishness on your PC. Disabling it can improve speeds and boot time.
How to Disable Superfetch on Windows 11
Disabling Superfetch, or SysMain, can improve speed and fix 100% disk usage. But on the other hand, disabling it could cause issues on older PCs.
A good way to test things is to switch it off and see if your PC’s performance improves. If there’s no noticeable difference, just turn it back on afterward.
To disable Superfetch on Windows 11:
- Hit the keyboard shortcut Windows key + R to launch the Run dialog.
- Type services.msc and click OK.

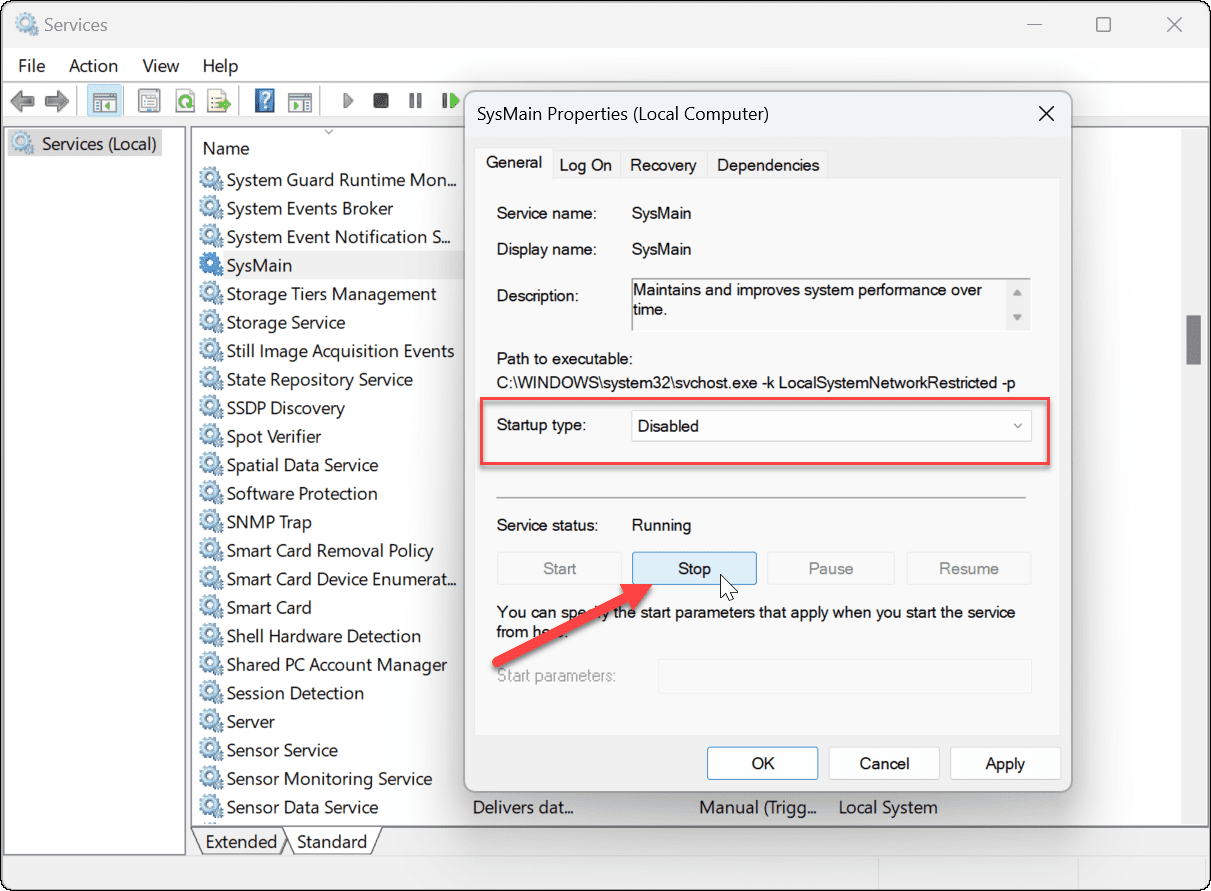
- When the Services console opens, double-click on the SysMain option and press the Stop button.
- Next, click the dropdown menu next to Startup type and set it to Disabled.

- Click Apply and OK to close out of the Services console.

Now that you have disabled Superfetch (SysMain), you should notice an improvement in system speed. If you’re experiencing high disk usage, it should also improve.
You may want to restart Windows 11 after making the adjustments to ensure the issue you’re having is fixed.
How to Disable Superfetch on Windows 11 via Terminal
You can also disable Superfetch using the Windows Terminal, PowerShell, or older command prompt. These instructions will work for all three tools.
To disable Superfetch from the Terminal or command prompt:
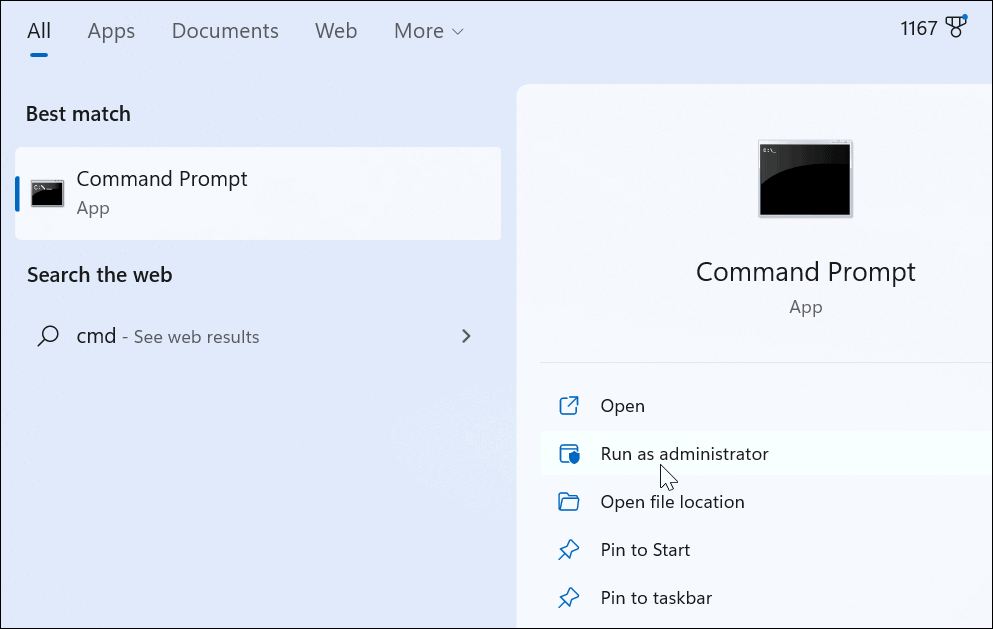
- Click the Start button or press the Windows key on your keyboard.
- Search for cmd or Windows Terminal.
- Click the Run as Administrator option on the right.

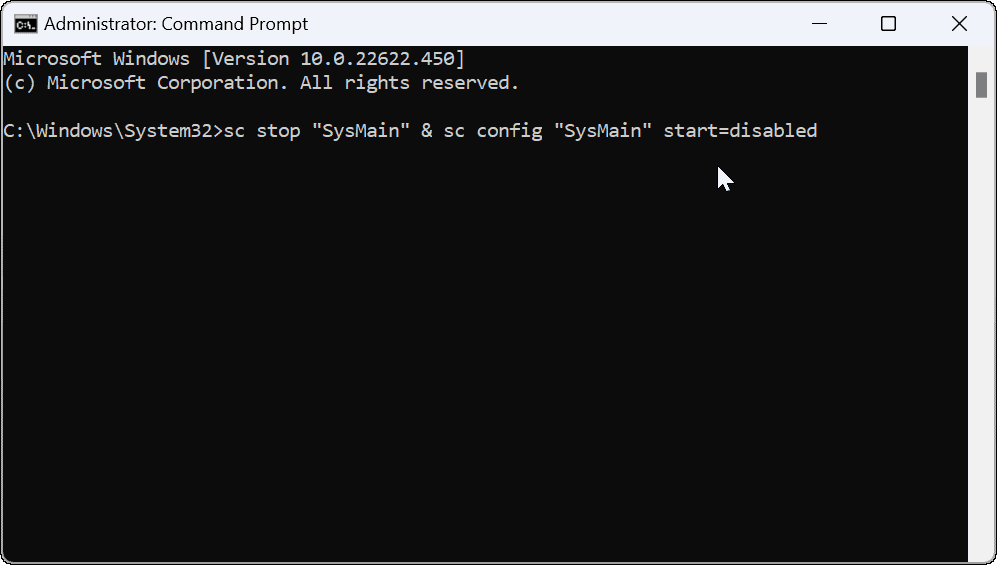
- In the prompt, run the following command:
sc stop "SysMain" & sc config "SysMain" start=disabled

- After running the command, you should see the following screen showing you it was successful.

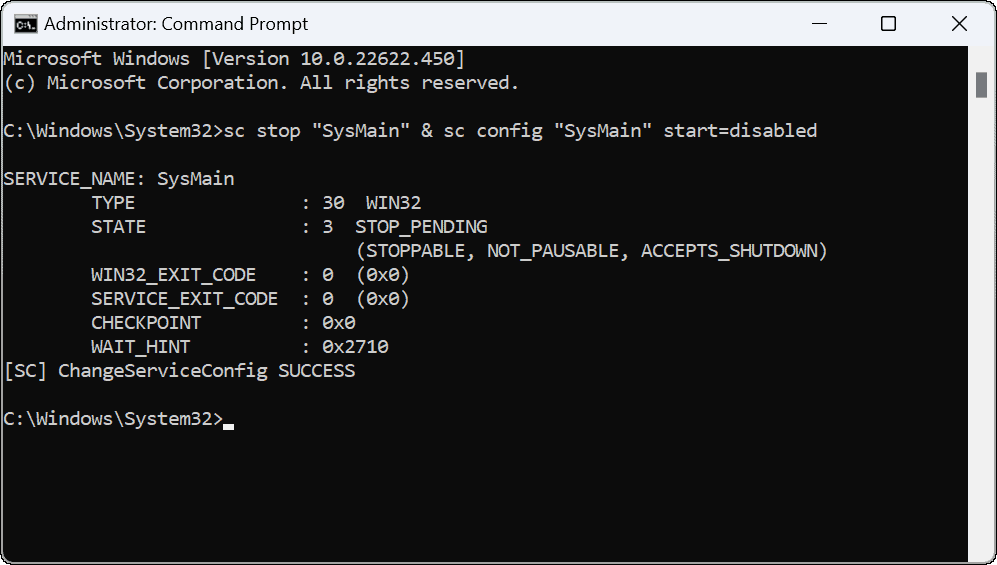
After running the command, Superfetch will be disabled and will no longer start when you reboot your machine.
Improving Disk Usage on Windows 11
Microsoft will often add new features to improve the overall Windows experience. As well-intentioned as these are, it doesn’t always work out that way, and you may need to switch these off. If you’re having this problem with SysMain on Windows 11, the steps above should help to switch it off and resolve it.
When it comes to managing your disk on Windows 11, there are several options. For example, there are six ways to open Disk Management on Windows 11. You can also limit disk space used by the Recycle Bin.
It’s also worth noting that you can free up disk space with cleanup recommendations on Windows 11.


beergas
September 6, 2022 at 9:22 am
Seems to help on Windows 11 on decent PC. Quickly noticed snappier apps responses, didn’t even reboot yet. Thanks.
dan
September 6, 2022 at 11:57 am
I assume disabling SysMain works for Windows 10 as well – right?
Also, what is the Powershell to enable it if disabling didn’t work out?
BTW, I sometimes see where my CPU is close to 100%! Any suggestions for that (other than closing apps?)
Thanks,
Dan
Anon
June 12, 2023 at 9:14 am
Wow a PRE-FETCH functionality that is called “Superfetch” and the actual service is called “SysMain” – I mean if that doesn’t explain the ridiculous anti-reliability culture at Micro$oft then nothing does.