How to Create and Print Labels in Word
Word isn’t just for letters or academic reports. You can also use it to create other types of documents, including labels. Here’s how to create and print labels in Word.
Do you need to send a lot of postage letters? You don’t need to write addresses by hand—you can create a label in Word to save time.
You can also use Word to create labels for other uses, including name tags and product labels. If you’re unsure how to create and print labels in Word, use the steps below to get started.
How to Create and Print a Label in Word
There are two ways to create a label in Word. The easiest method is to create a single or multiple copies of an identical label.
If you want to create a single address postage label, you could decide to do this. Alternatively, you can use this feature to create multiple copies of other types of labels (such as product ID tags).
To create and print a label in Word:
- Open a new Word document.
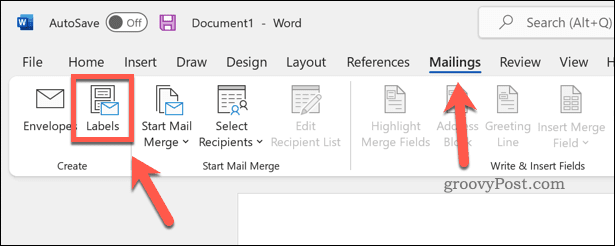
- Press Mailings > Labels on the ribbon bar.

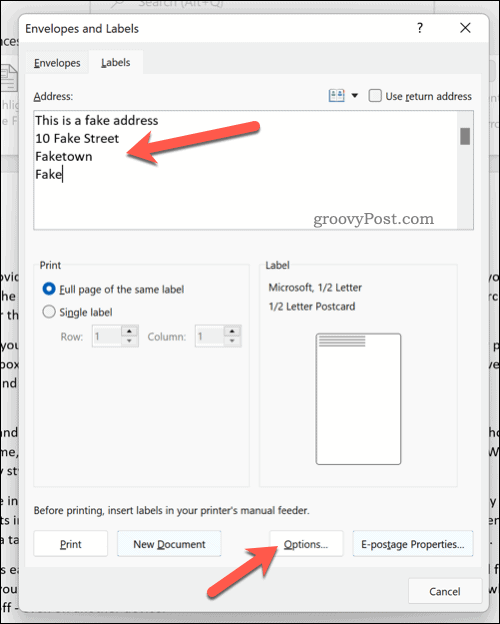
- Type your address (or other relevant information) in the Address box.
- Tap Options (or Label Options) to make further changes to your label.

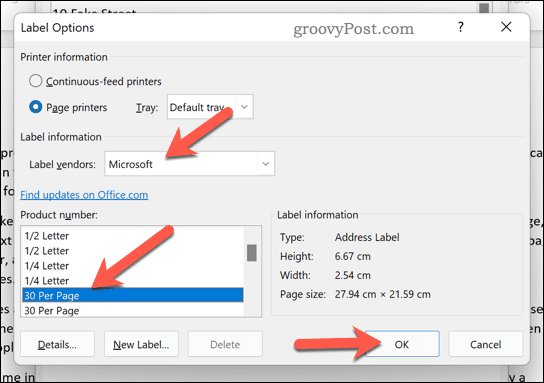
- In the Label Options window, select a label vendor to use specific dimensions for a type of printed label. Alternatively, select Microsoft.
- Select the product number from the list provided. If you select Microsoft, you can select how big the label will be (or how many will fit on a page).
- Press OK.

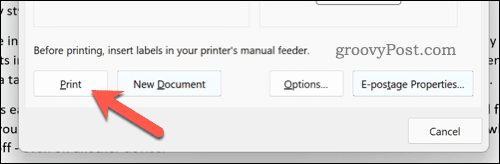
- Confirm your print options in the Envelopes and Labels menu.
- When you’re ready, press Print to print the labels.

How to Create and Print Different Labels in Word
Do you need to create several different labels (such as name tags or product names)? You can do this by editing the document in the Envelopes and Labels menu.
To create and print different labels in Word:
- Open a new Word document.
- Press Mailings > Labels on the ribbon bar.
- In Envelopes and Labels, click Options (or Label Options).

- Confirm your label type and size options. If you’re unsure, select Microsoft as the label vendor and choose a common preset.
- Press OK.
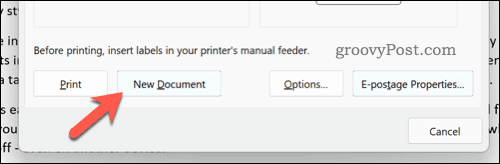
- Confirm further details (such as your page size options) in the Envelopes and Labels menu.
- Press New Document to move the labels into your Word document itself.
- Press Layout > View Gridlines to make it easier to visualize how the labels are separated on a page in the editing view.
- Make changes to edit label as required (eg. add individual names).

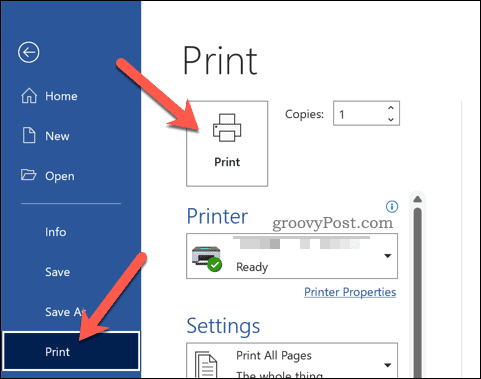
- To print the labels, press File > Print > Print.


How to Create and Print Address Labels in Word
You can also use mail merge to import a mailing list of addresses onto easily printed label designs in Word.
To use mail merge to create address labels in Word:
- Open a new Word document.
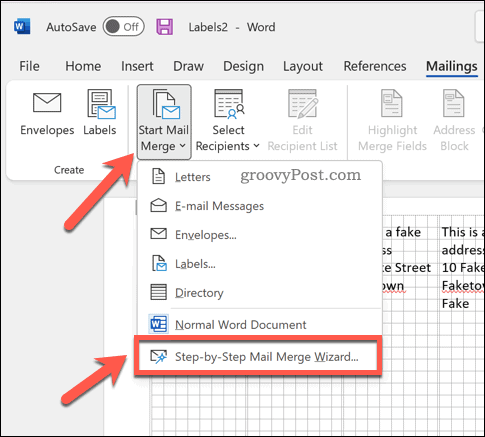
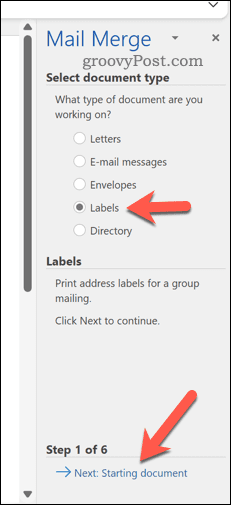
- Press Mailings > Start Mail Merge > Step-by-Step Mail Merge Wizard.

- In the sidebar, select Labels as the document type and press Next.

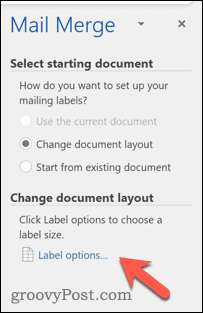
- Select the starting document and press Label options.

- In the pop-up window, confirm your label sizes or press New Label to create your own, then press OK.
- Return to the Mail Merge sidebar and press Next.
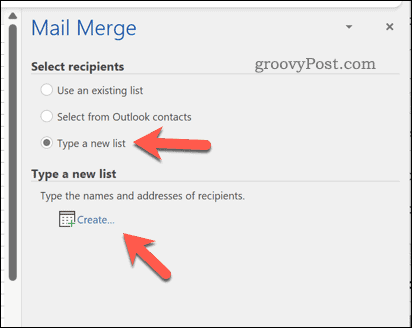
- Select your recipients using an existing list, from your Outlook contacts, or press Type a new list to create a new list.
- If you want to type in your own list, press Create.

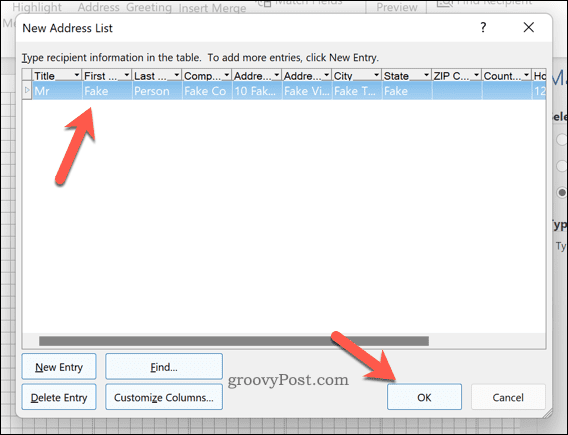
- In the New Address List window, add your addresses as required, then press OK.

- Save your mailing list to a file when directed.
- In the Mail Merge Recipients box, confirm which recipients you wish to add to your mail merge and press OK.

- Return to the Mail Merge sidebar and press Next.
- Use the sidebar menu to change the layout and design of your label (using the first label as your guide) and press Update all labels to apply any changes to the entire label page.

- Press Next.
- If you’re happy with the preview, press Next again to complete the mail merge wizard.
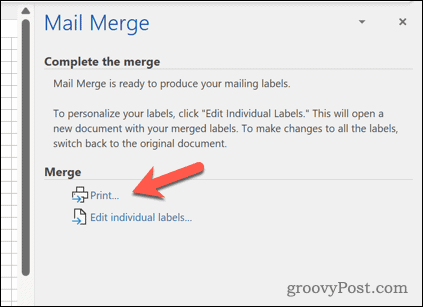
- If you want to print the labels, press Print.


Creating and Printing Labels in Word
The steps above should help you to create and print labels in Word. If you need to quickly print a lot of addresses, you can use this feature (along with mail merging) to print out your labels to save time.
Are you writing letters that require a signature? You can always add your handwritten signature to your Word document. You can also create and print envelopes for your letters.


