How to Change the Slide Orientation of a PowerPoint Presentation

Does the content for your slideshow not quite fit the layout? Here’s how to change the slide orientation in PowerPoint to portrait.
It makes sense that slides in PowerPoint are in landscape layout. But that doesn’t mean that a portrait layout can’t work in your particular presentation.
We’ll show you how to change the slide orientation in PowerPoint on Windows, Mac, and the web. So for your current presentation or your next one, you can easily modify the orientation to fit your content.
Note: At this time, you cannot change the slide orientation in the PowerPoint mobile app.
Change the Slide Orientation in PowerPoint on Windows
Open your slideshow or create a new one in the PowerPoint application on Windows. Then, follow these steps to change the slide orientation.
- Go to the Design tab.
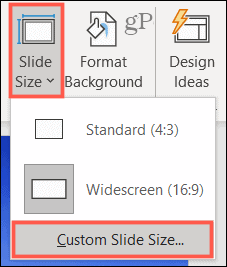
- On the far right of the ribbon, click Slide Size > Custom Slide Size in the Customize section.

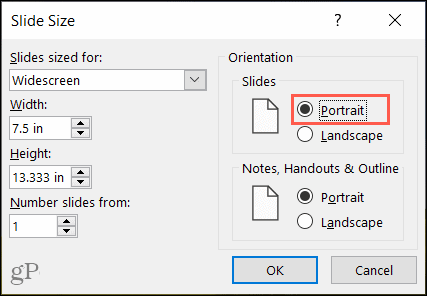
- Mark the Portrait option on the top right of the pop-up window below Slides. You can make any other adjustments you like in the window for things like width and height.

- Click OK.
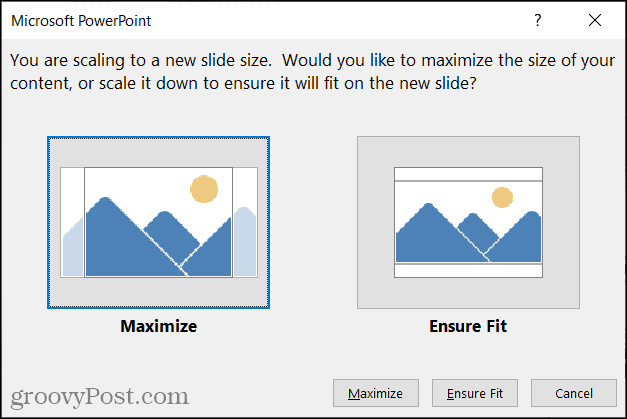
- In the subsequent pop-up window, choose Maximize or Ensure Fit. Because you selected a new slide size, you’ll be asked to maximize the size of your content or scale it to fit the new slide orientation.

And that’s it! Your presentation should now display in portrait view.


Change the Slide Orientation in PowerPoint on Mac
Open your presentation or create a new one in PowerPoint on Mac. The steps are similar to those on Windows, with some slight wording differences.
- Go to the Design tab.
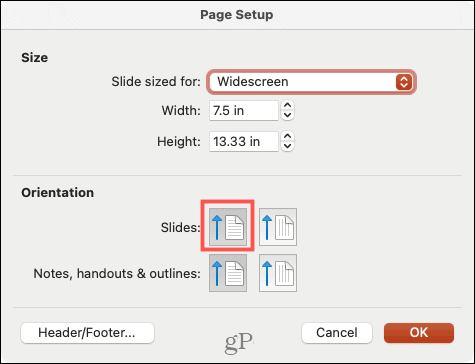
- On the far right of the ribbon, click Slide Size > Page Setup.


- Choose the Portrait option next to Slides in the Orientation section of the pop-up. This is the option on the left side. You can make other changes as well for things like width and height.

- Click OK.
- In the following pop-up window, choose Scale Up or Scale Down. This prompt helps you to adjust the size of your content to fit the new slide orientation.
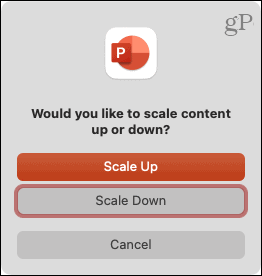

There you go, Mac users. Your presentation is now in portrait view, ready for you to finish.


Change the Slide Orientation in PowerPoint on the Web
If you use PowerPoint on the web instead of your desktop, you can change the slide orientation there just as easily
- Go to the Design tab.
- On the far right of the ribbon, click Slide Size > Custom Slide Size.

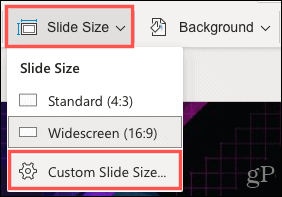
- Choose Portrait next to Slide Orientation and optionally make any other changes as you wish.

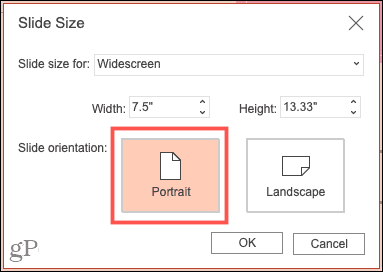
- Click OK.
- In the subsequent pop-up window, choose Maximize or Ensure Fit.


Voila! Your PowerPoint slideshow is now in portrait view.


The Perfect View for Your PowerPoint Slideshow
Most of the time, the landscape layout for a PowerPoint presentation is ideal. This is why the slide orientation is in that view by default. But if there comes a time when changing the orientation will make your presentation perfect, you can do it in a few clicks!
For more help with PowerPoint, check out how to import and reuse slides or add slides numbers to your presentation.
Leave a Reply
Leave a Reply


