How to Change the Margins in Microsoft Word

If you have requirements for a paper or document, you may be wondering how to change the margins in Word. We’ll walk you through it!
When you’re setting up a document in Microsoft Word, you may need to adjust the margins. You might be creating a document for a school that requires specific margins or one for your business where you simply prefer certain spacing.
Depending on which platform you’re using, Word not only gives you a selection of fixed margin settings but a custom option as well. Since these options differ slightly per your Word version, we’ll show you how to change the margins and where they vary in Word on Windows, Mac, the web, and in the mobile app.
Change the Margins in Word on Your Desktop or the Web
How you adjust the margins in Word is the same in the application on Windows, Mac, and the web. The differences are the preset options you can pick from and a few custom margin settings.
Fixed Margin Settings
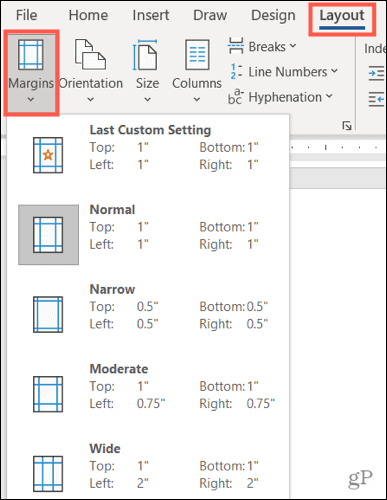
Open your Word document and go to the Layout tab. Click the Margins drop-down arrow on the top left side of the ribbon. You’ll first see the fixed margin settings you can choose from.
You can choose Normal, Narrow, Moderate, or Wide in all three Word locations. And you can see the number of inches per margin next to each preset option.


There are two additional fixed options that vary per platform:
- Mirrored: Available in Word on Windows and Mac.
- Office 2003 Default: Available in Word on Windows and the web.


Choose the preset margin setting you want to use for your document, which will apply immediately. If you prefer to use Custom Margins, this is available on Windows, Mac, and the web as well.
Custom Margin Settings
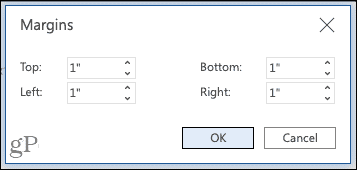
Select Custom Margins at the bottom of the Margins drop-down list. Enter a number in inches or use the arrows to adjust the Top, Bottom, Left, and Right margins.


Custom margins in Word on the web
In Word on Windows and Mac, you can take your margin settings a step further by selecting where to apply the custom settings, whether or not to use Gutter settings, and if you prefer a different page orientation for those margins (on Mac, click Page Setup to change the orientation).


Custom margins in Word on Windows (left) and Mac (right)
You also have the option to apply these custom margins as your default setting by clicking the button on the bottom left.
Change the Margins in the Word Mobile App
If you’re working in Microsoft Word on your mobile device, you can also change the margins for a document there.
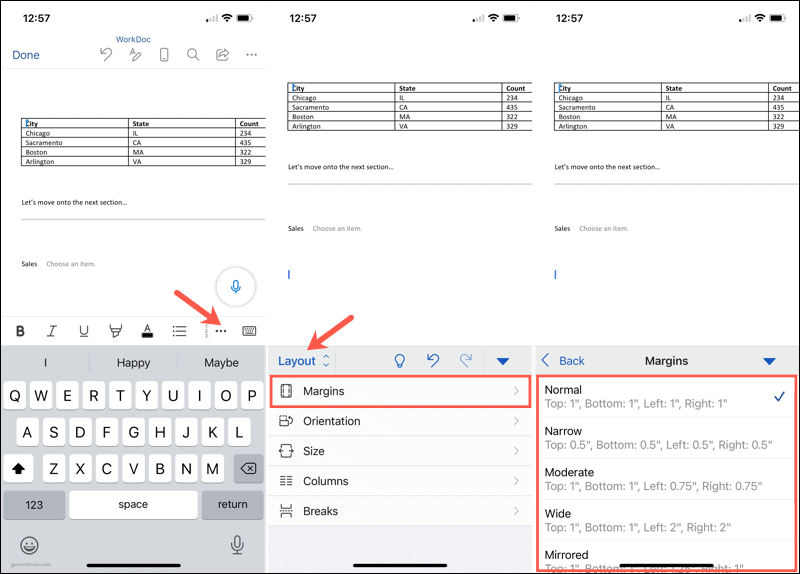
- Open your Word document and tap the three dots on the right side of the toolbar above your keyboard.
- Switch to the Layout tab.
- Select Margins.
- Tap a fixed margin setting to apply it. You can use Normal, Narrow, Moderate, Wide, or Mirrored.


Custom Margin Settings on Mobile
To use your own margins settings in the mobile app, follow the same steps as above but choose Custom Margins below the presets in Step 4.
Select each location, Top, Bottom, Left, and Right, enter the number in inches, and tap Done after each. You can then return to your document to keep working.


Prepare Your Document by Setting the Margins in Word
Changing your margins in Word takes only a couple of clicks or taps, so it’s worth the time to get your document set up before you begin. Although you can change the margins later if you discover that different settings would work better, remember that your document items may shift undesirably.
For additional help with your layout in Microsoft Word, take a look at how to work with page and section breaks or how to use outline view in Word.
Leave a Reply
Leave a Reply


