How to Change DNS Settings on Windows 10

If you want to make sure your web browsing on Windows 10 is faster and more secure you can change the DNS settings to servers other than your ISPs.
Changing the DNS settings on your PC allows you to use something that’s more secure and reliable than what your ISP offers. It can be easier to change DNS settings on your Wi-Fi router so all connected to it are using it. But you might want to change the DNS settings on individual devices, most importantly your PC.
There are a few ways you can change the DNS settings on Windows 10. And here we’ll take a look at using the classic Control Panel method. And how to change your DNS through the new Settings app.
DNS Server Settings
Here are the DNS settings for the three popular and free alternative DNS services out there:
- Cloudflare DNS: 1.1.1.1 and 1.0.0.1
- OpenDNS: 208.67.222.222 and 208.67.220.220
- Google Public DNS: 8.8.8.8 and 8.8.4.4
Change DNS Settings on Windows 10 via Settings
Longtime users of Windows 10 may prefer to use the Control Panel method. But with Windows 10 on a perpetual update cycle, we don’t know how long that will last. So, here’s a look at using the new Settings app. In fact, you might find this way is easier.
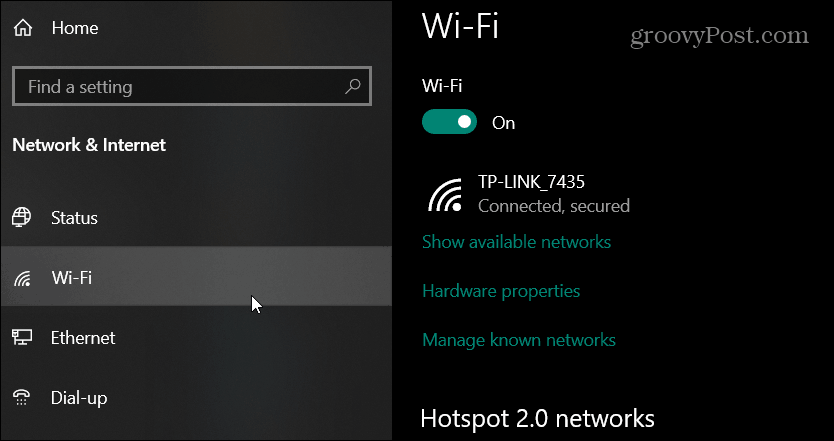
Open Settings > Network & Internet and then click your internet connection — either Ethernet or Wi-Fi.
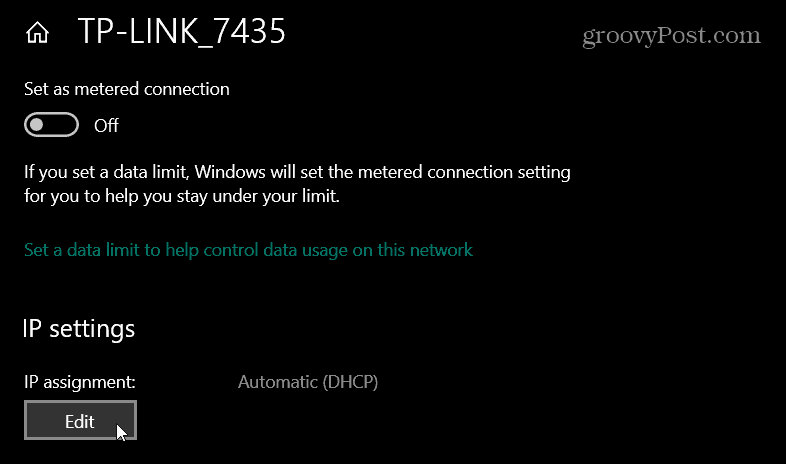
Next, scroll down to the IP settings section and click the Edit button under the IP assignment.
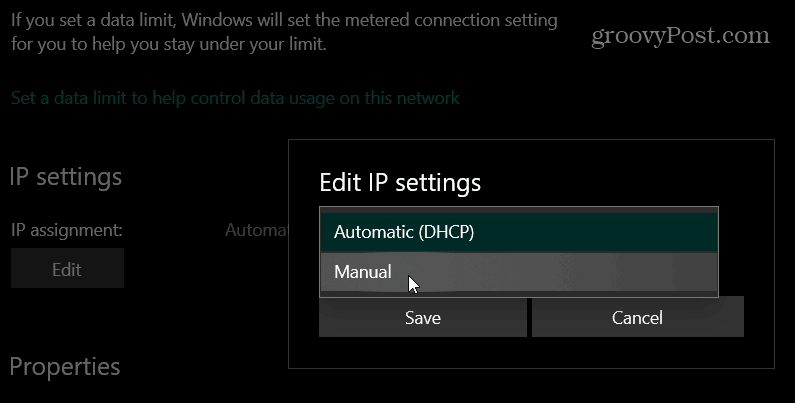
Then choose Manual from the dropdown in the dialog box that pops up and click Save.
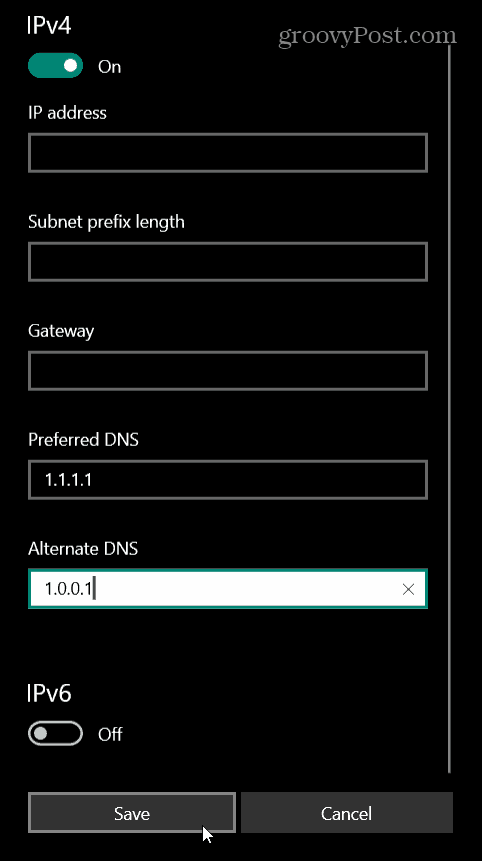
Turn on the IPv4 switch and under Preferred DNS type in the addresses of the DNS Service you want to use and click Save. For example, in the shot below I’m using Cloudflare DNS.
Change DNS Settings on Windows 10 Through Control Panel
The process of changing DNS settings on Windows 10 through the Control Panel settings is basically the same as it has been in earlier versions of Windows. Microsoft has hidden the classic Control Panel but getting to its network settings is simple.
Hit the Windows Key and type: network connections and hit Enter. That will open the Network Connections section in Control Panel. Right-click on the network adapter you’re connecting with and choose Properties.
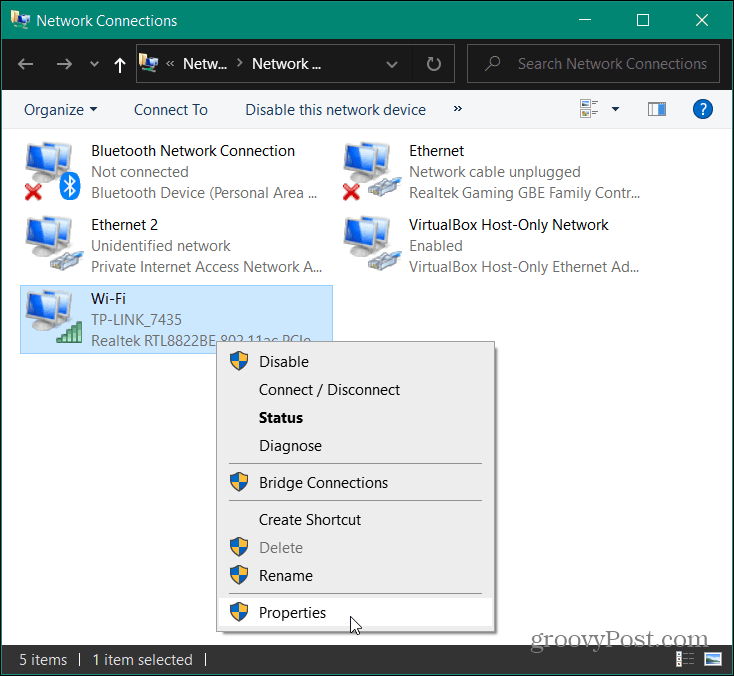
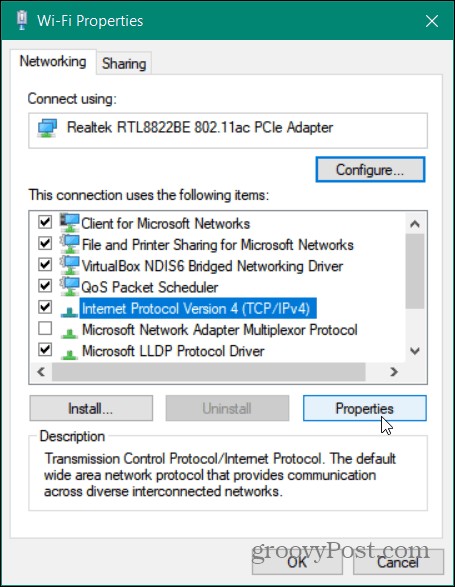
Next, highlight Internet Protocol Version 4 (TCP/IP) from the list and click the Properties button.
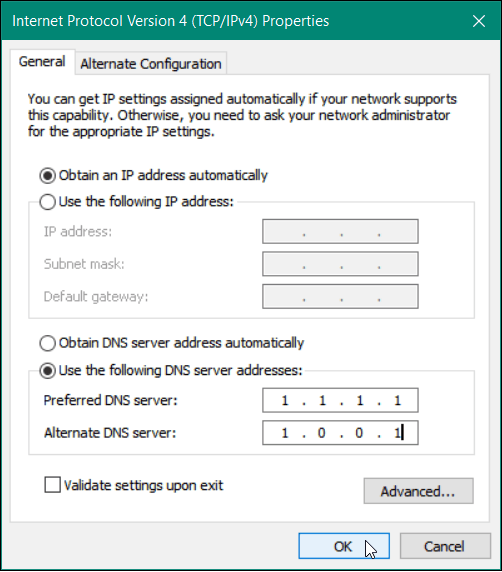
In the next window, choose Use the following DNS server addresses type in the correct addresses for the service you want to use and click OK.
Verify Your DNS Settings
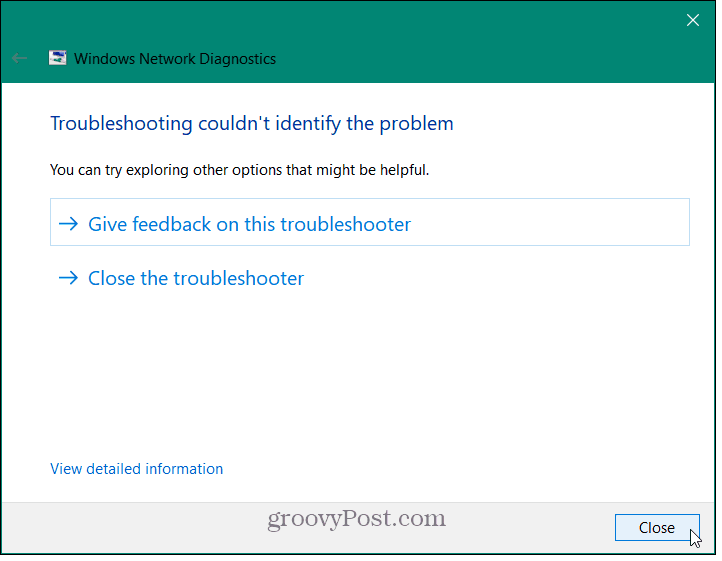
Want to make sure it worked? If you use the Control Panel option, note that you check the Validate settings upon exit box. It will run Windows Troubleshooter and look for any issues. If the settings were entered correctly it will tell you no problems were identified. If not, just go back in and make sure you entered the correct server addresses.
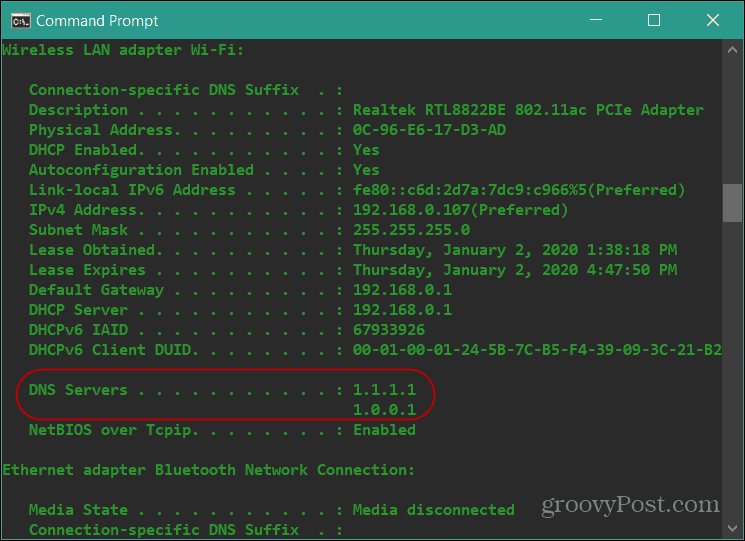
Another way to verify your changes went through successfully is to launch the Command Prompt and type: ipconfig /all. Scroll down and you should see the changes to the DNS settings under the adapter your PC is connected to.
Try Alternative DNS Services
Using alternative DNS services can improve your privacy and browsing speed. But it’s important to try out different services to see which one works the best for you.
Cloudflare DNS is currently rated the fastest in resolving the host. The company touts that webpages will load 28% faster. In addition, it provides extra browsing privacy as it never sells your info to third-parties and wipes your DNS queries every 24 hours.
OpenDNS provides additional customization. It offers content filtering and personalized messages at the router level, for example. And in the end, you might find you that your ISP’s service provides the fastest browsing experience.