How to Automatically Save Excel Files to OneDrive

Yes, you can save Excel files to OneDrive automatically. Best of all, the process couldn’t be easier. Here are the requirements and steps to do so.
Microsoft Excel is part of Microsoft 365, which gives subscribers access to 1 TB of Microsoft OneDrive storage. It makes sense it’s possible to save Excel files to OneDrive automatically. And it couldn’t be much easier.
AutoSave and AutoRecover
Before getting started, it’s important to understand the differences between AutoSave and AutoRecover. With AutoSave, your spreadsheet is saved in real-time to Microsoft OneDrive or SharePoint. It requires an active Microsoft 365 subscription. By contrast, AutoRecover is a feature that automatically protects your work in case of an unexpected computer shutdown. In this case, once power is restored, AutoRecover returns you to your document at the last point the tool ran. AutoRecover works on a set interval, with the default being 10 minutes. AutoRecover was first introduced with Office 2007. You’ll learn more about both AutoSave and AutoRecover below.
Automatically Save Excel Files to OneDrive
To set up AutoSave in Microsoft Excel, you must first save your file to your OneDrive or SharePoint folder from within the respective app.
From there:
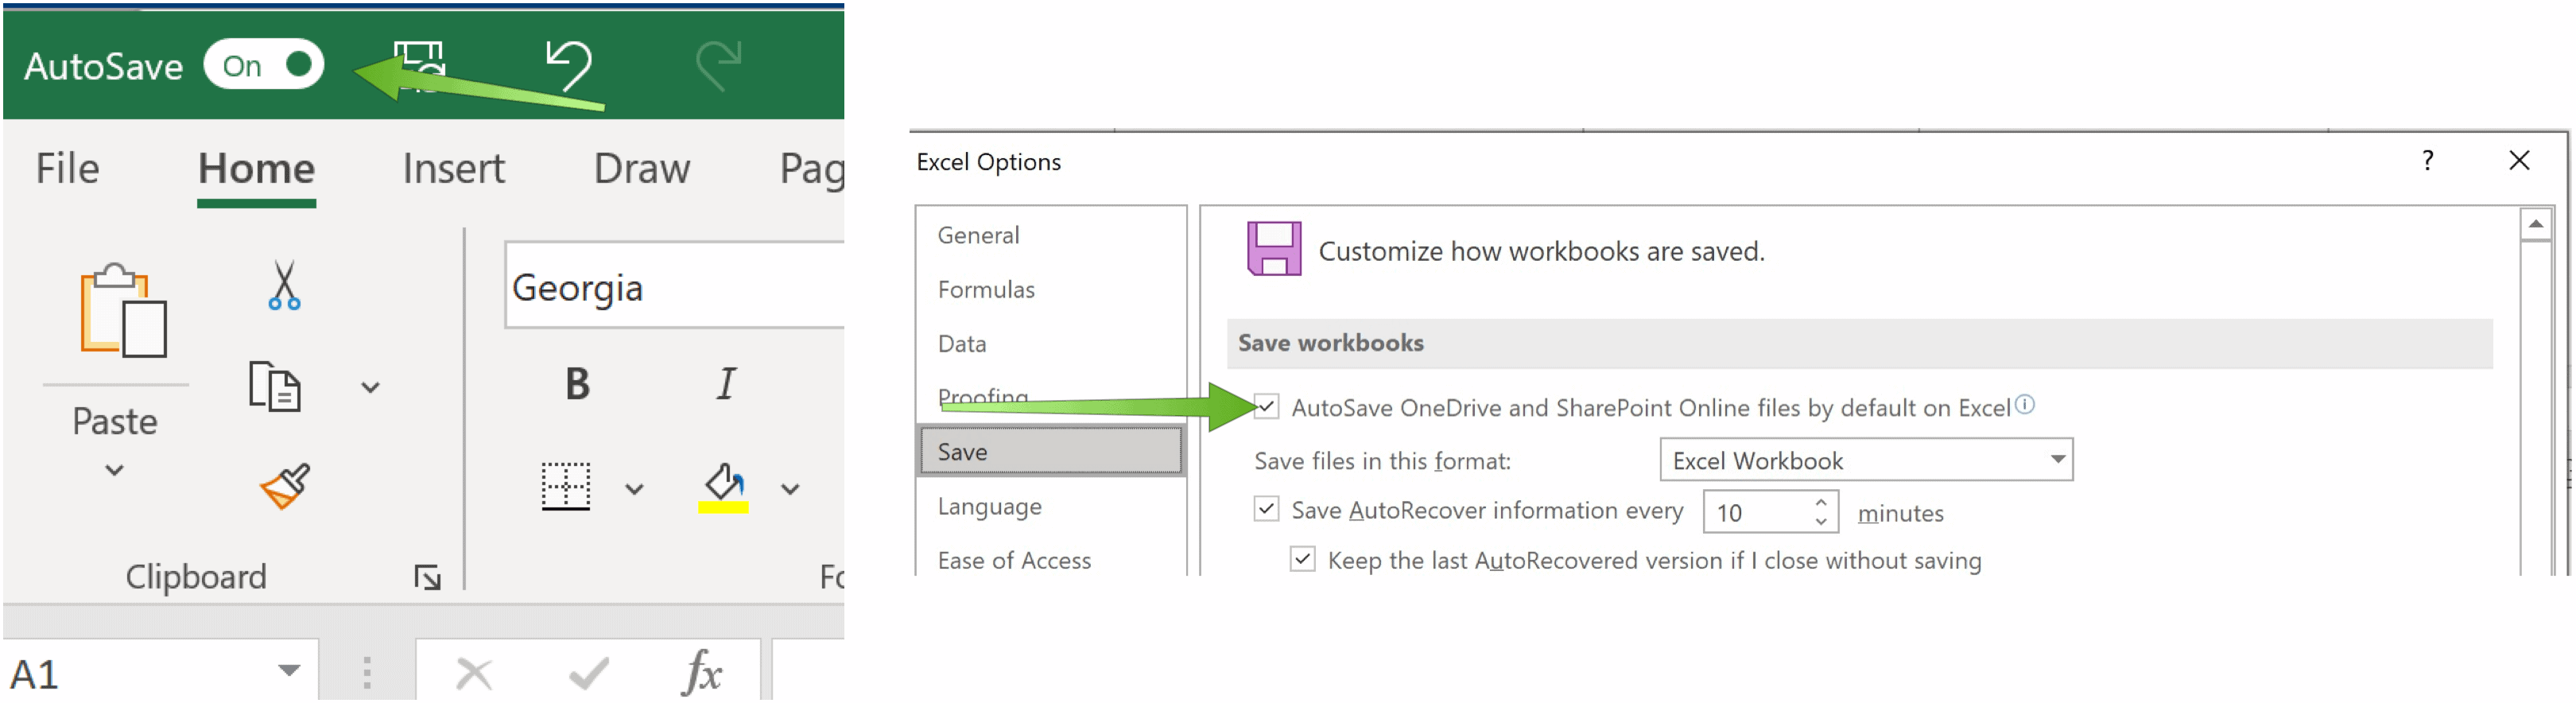
- Choose File > Options.
- Click Save.
- Check the box for AutoSave OneDrive and SharePoint Online files by default on Excel.
- Choose OK to exit the window.
- Exit, then restart Excel.
Follow these steps each time you save a new file in Microsoft Excel. As such, it will automatically Save Excel Files to OneDrive or SharePoint as long as the file is initially saved to one of those locations.
Security Concern
Saving Excel workbooks to OneDrive or SharePoint does have some risks since you’re saving externally. Therefore, some advocate adding password protection to any file that includes sensitive information. For its part, Microsoft offers a lengthy online document indicating how it secures OneDrive data.
Using AutoRecover
To establish settings for AutoRecover in Microsoft Excel:
- Choose File > Options.
- Click Save.
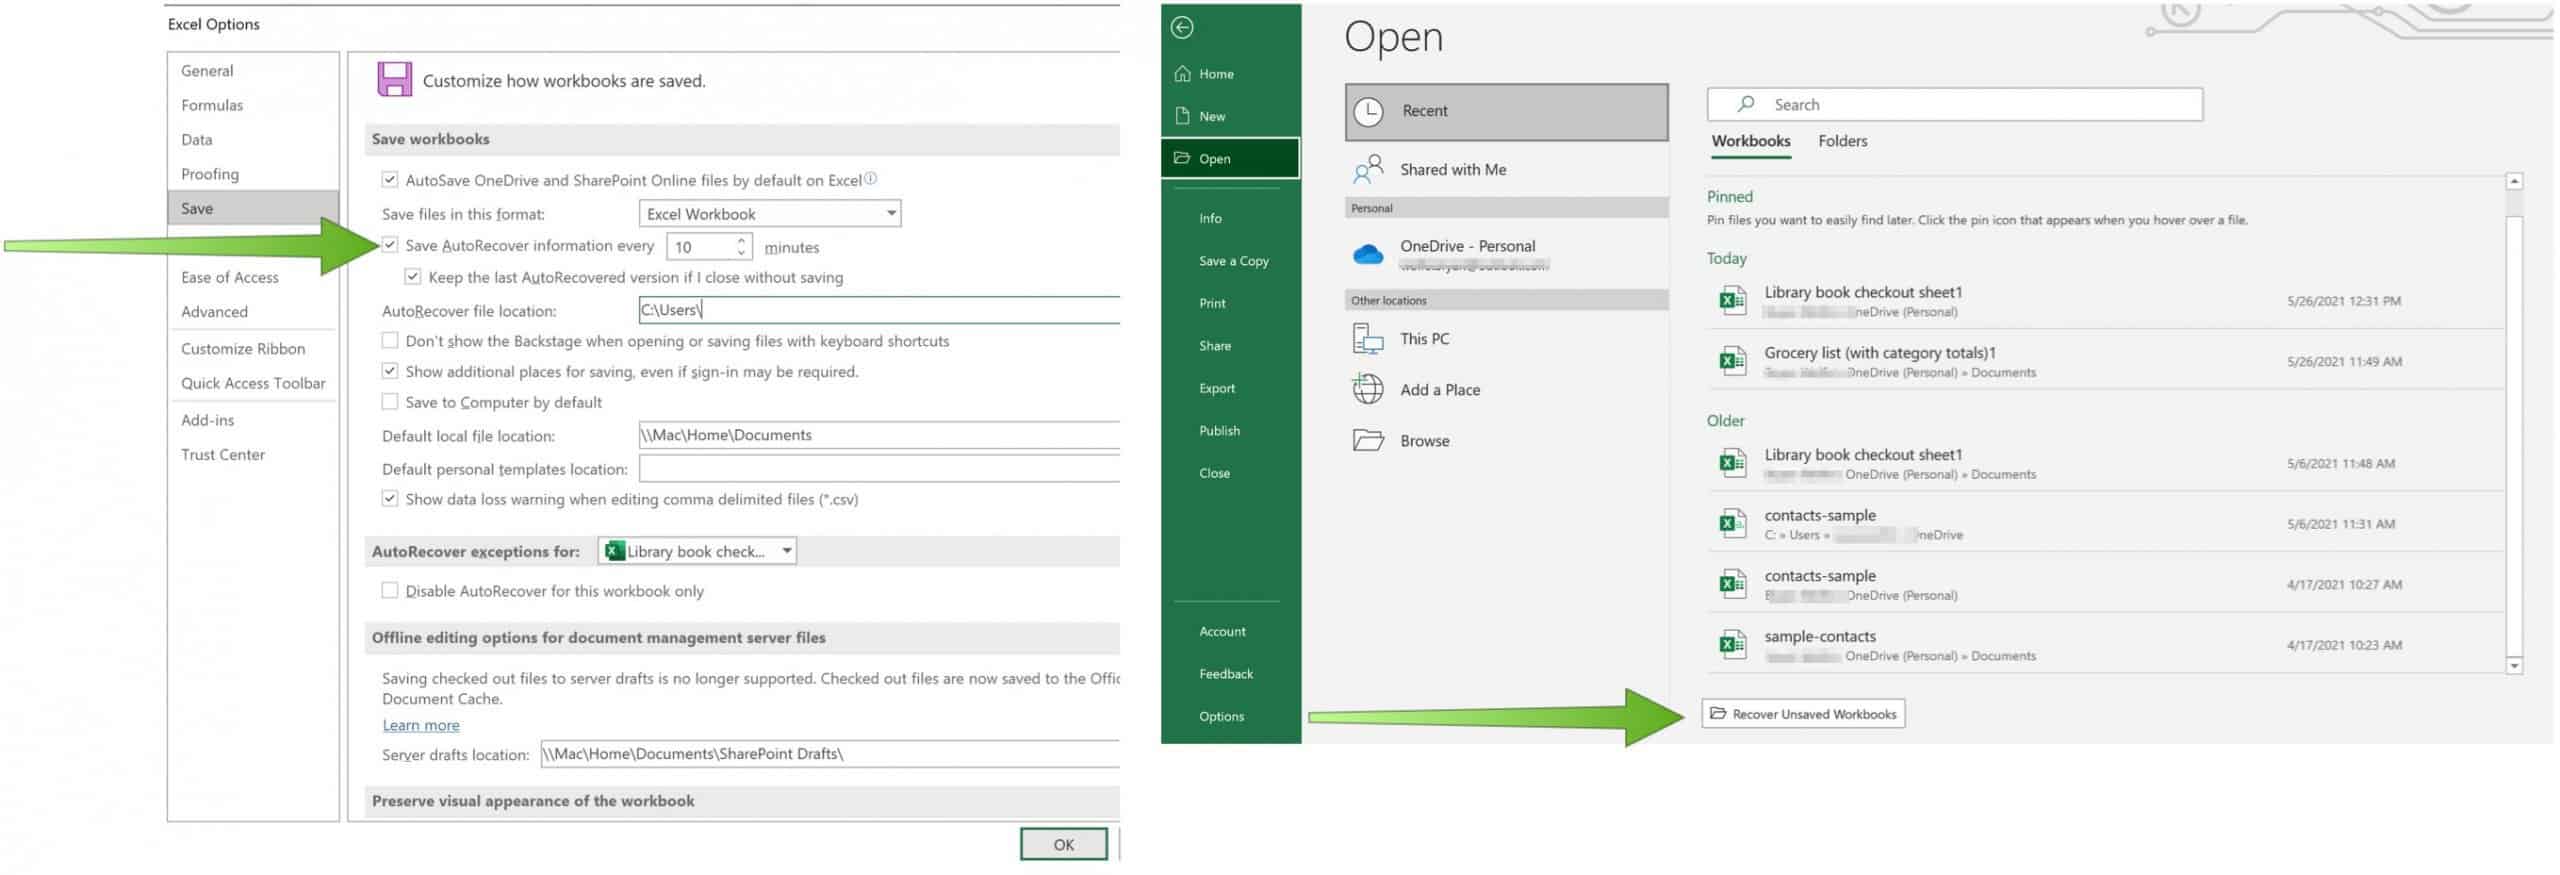
- Next, check the box for Save AutoRecover information, then add an interval.
- Confirm the local location of the AutoRecover files, or make changes.
- Choose OK to exit the window.
- Exit, then restart Excel.
From now on, your Microsoft Excel files will AutoRecover based on the time frame you established. In the event of an emergency that shuts down your computer, you’ll see the latest saved version of the file upon your return.
If the AutoRecover version of the Excel workbook isn’t opened, choose File > Open, then click the Recover Unsaved Workbooks button. Open the correct file.
As you probably guessed, Microsoft Excel offers lots of functionality. In recent posts, we’ve covered how to use quick analysis to visualize data, split data into multiple columns, and export contacts from an Excel worksheet to Outlook, among many others.
For home use, the Microsoft 365 suite is currently available in three varieties, including a Family, Personal, and Home & Student plan. The first is $100 per year (or $10/month) and includes Word, Excel, PowerPoint, OneNote, and Outlook for Mac. It’s useful for up to six users. The Personal version is for one person and is $70/year or $6.99 per month. The student plan is a one-time purchase of $150 and includes Word, Excel, and PowerPoint. Further, business users can select from Basic, Standard, and Premium plans, starting at $5 per user/month.


